
yukino_asano
Member
Hello Everyone.
I been working on a irrigation controller setup. I have now setup 2x and now ready to build mine and show you how it is done. This may get kinda complicated so please let me know if you have any questions.
This all based on "Hunter style" valves. You see this used for landscaping and yards.
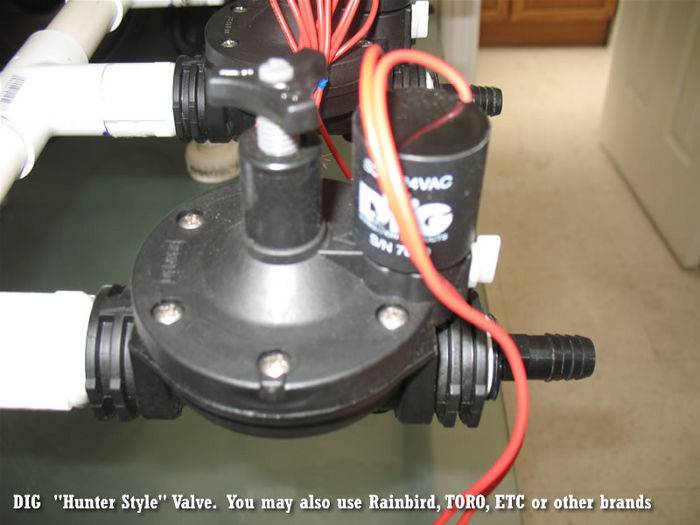
But you do not see for indoor hydroponics often. Why? Because you need some way to control the pump Got it worked out.
why am I doing this?
Well usually you hook a pump up to a timer. And use that to control your irrigation/drip system.
Because most timers minimum setting is 60 seconds/1 minute.
Well this is too long and causes too much waste. Also doesnt work well for young plants (can get overwatered)
The other drawback is it cannot control multiple pumps and resevoirs.
For example: I want to flush one time a week with water.
Or I want to do a flush feed flush method of feeding.
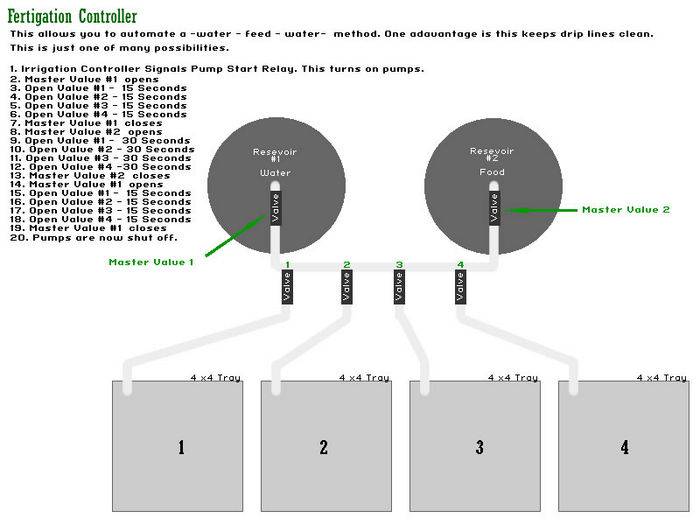
If you look at methods used by commercial greenhouses you will see the water feed water method being used.
This allows you to pre-treat the medium with water before adding food. Therefore reducing the chance of burning the roots.
There is less salt buildup in rockwool and coco therefore reducing the need for flushing.
The drip lines are kept cleaner.
This will also allow you to use organic based food.
You can also program the irrigation controller to do a feed feed feed flush or however you can designs
Ok enough with some of the pros.
Let show how this works and is setup.
I am showing you this to help you save money and to show how to put it together and track down the parts.
If you are only using one res, you can get all the parts at home depot!!
I want to automate feeding and flushing. That is why I am using the Dig 5006-!P irrigation controller.
Also has many features that kick ass and will make things easier.
Ok here is the plan for my setup. This helps you to see the trays, valves, res and irrigation lines. You would change for the number of res's and number of trays you have.
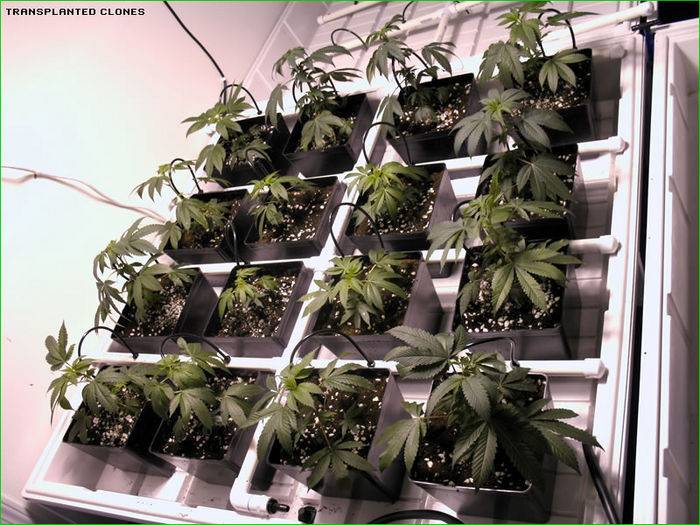
Example of Drip setup. (see pico's tutorial on how to build PVC drip manifolds)
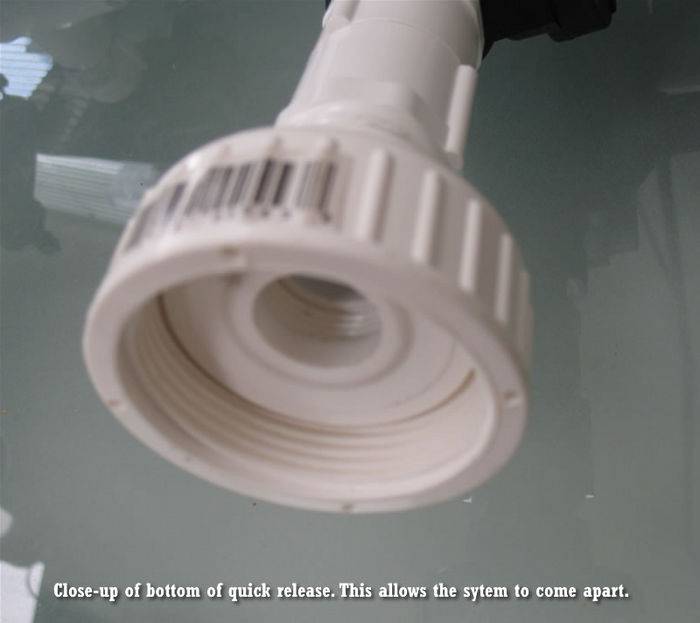
I suggest creating them with the ability to come apart. Make for easier cleaning and transporting.
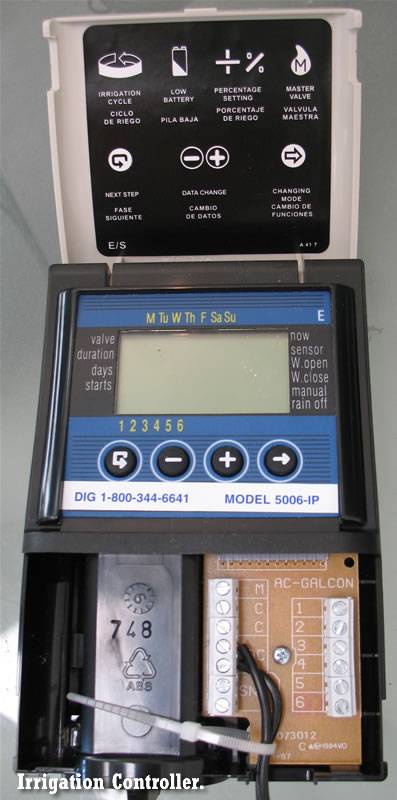
DIG 5006-IP Irrigation controller. This is a commercial unit. Took me a while to locate it. I originally tried to do this setup with a toro unit from home depot. It works but will only control one master valve. (will explain more about that later)
Model 5006-IP
Application:
* Greenhouses and nursery
* Irrigation, cooling and propagation
Watering Schedules:
Watering schedules can be set according to four different programs:
# Standard watering cycle: 7 day calender
# Cyclical watering cycle: intervals from 1 to 30 days
# Repeat watering cycle: intervals from 1 to 23 hours
# Repeat watering cycle: intervals from 1 to 60 minutes with option to operate in limited time of the day AM or PM
# Repeat watering cycle: from 1 minute to 5 minutes in 1 minute interval
# Repeat watering cycle: from 15 minutes to 45 minutes in 15 minutes interval
Features:
* Independent program start time, run time and day of the week for each valve
* Four button with an integrated liquid crystal display (LCD)
* Easy to read AM/PM clock
* Four start times per day, per valve for a maximum of 24 start times for all valves (irrigation mode)
* Automatic short circuit valve detection isolates the shorted valve and continues irrigation cycle
* Internal circuit board eliminates the need for fuses or a circuit breaker
* Start time stacking prevents hydraulic overload
* Watering durations from 1 second up to 12 hours in 1 second increments
* 7 day customized programming schedule or intervals from 1 to 30 days
* Rain delay up to 30 days with auto restart
* Large clear display for easy programming
* Can operate two valves at the same time
* Waiting mode for third and fourth valves
* Three modes: automatic, semi automatic and manual
* One 9v alkaline battery backup to retain program memory during a power outage
* Digital display, low battery indicator
* Master valve remote pump start circuit
* Default program: after prolonged power interruption each station will operate for 10 minutes
* Can be programed under backup battery power without AC power connection
* Can be used with a rain sensor
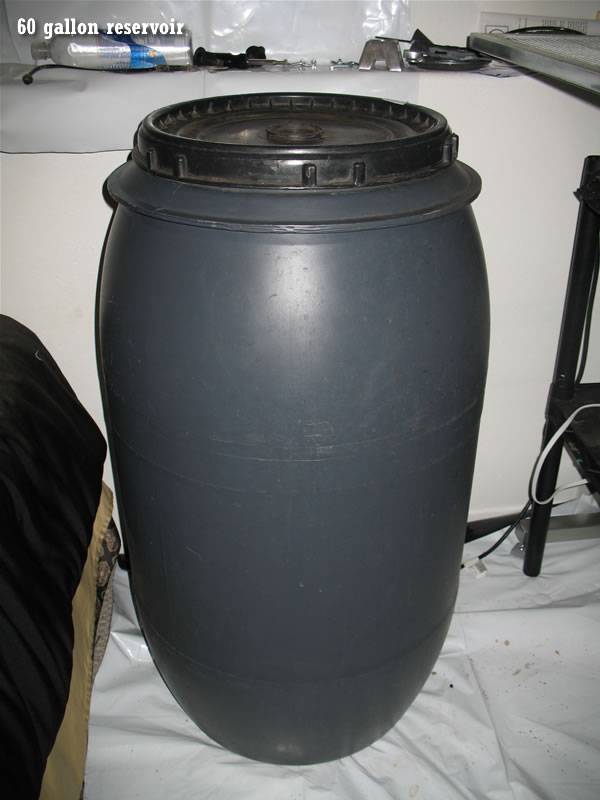
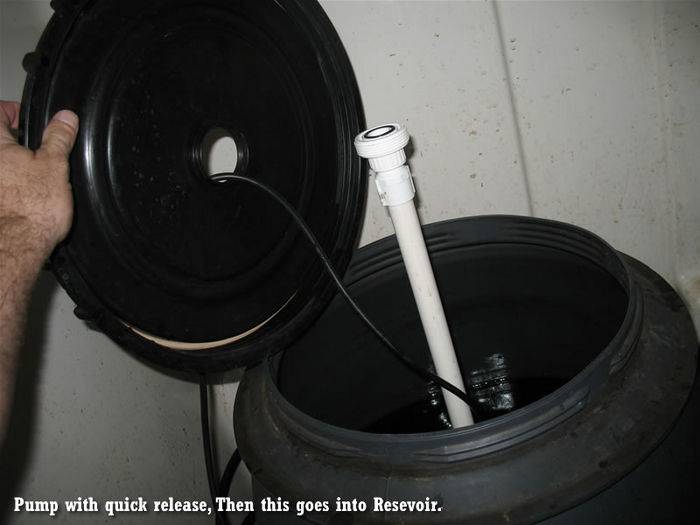
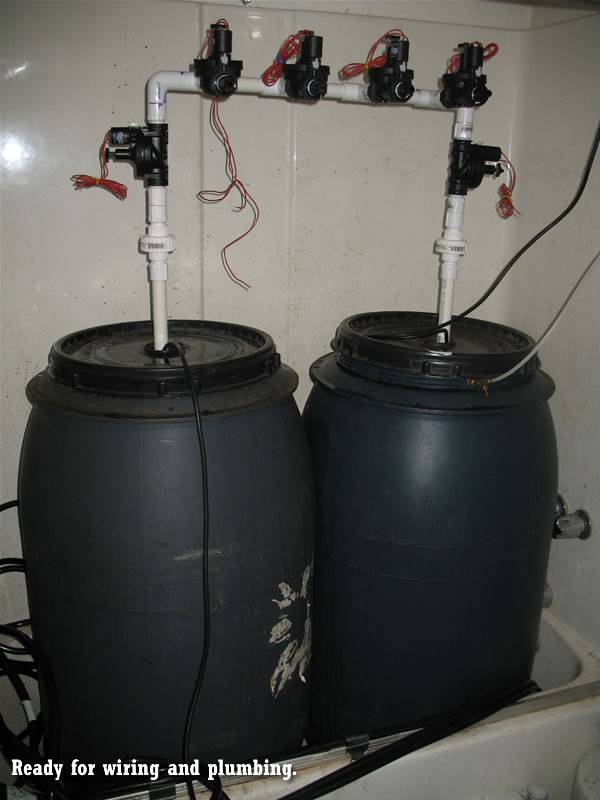
I am using 2 60 gallon res. I measured the distance between them in order to build a manifold that houses the valves. I also added a threaded junction so I could use lids on the resevoirs.
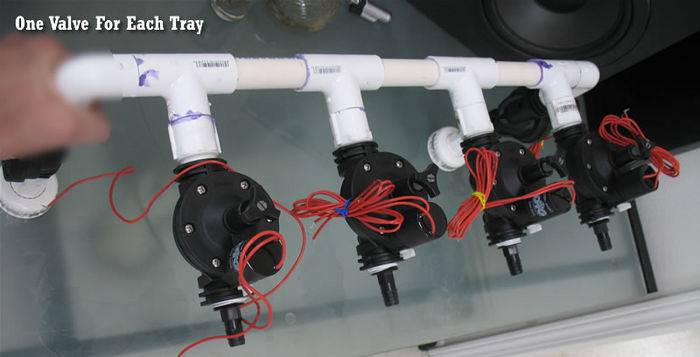
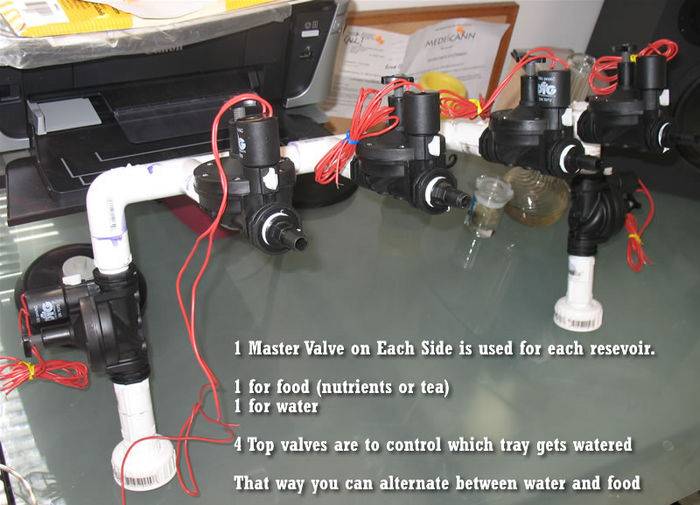
There is one master valve for each res, then a valve for each tray/manifold that gets waterered/fed.

Ok here is the 2 res with manifold pumps, ready for wiring
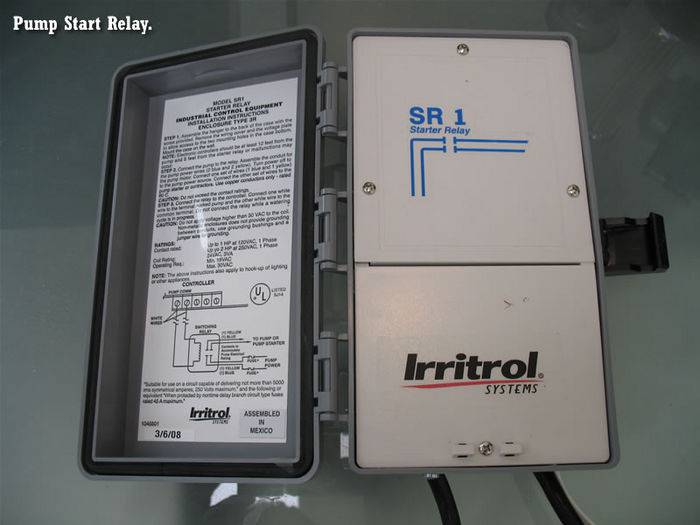
here is a pump start relay. Basically a box with a relay inside. this will allwos the irrigation controller to turn on your pond pumps.
This is where it becomes confusing if you were to try and but the parts at landscape store. Well know you know what to ask for now. If your a electrical whiz I am sure you could build this for cheaper.
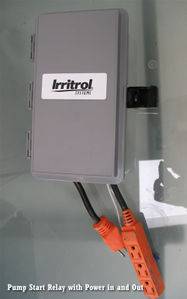
I took a extension cord and cut it in half. I then wired both ends into the pump start relay. The male end plugs into the wall. This supplies power to the relay. The female end comes out of the relay and that is where you attach your pond pumps. There is also a wire you will run to the irrigation controller. That is the white wire.
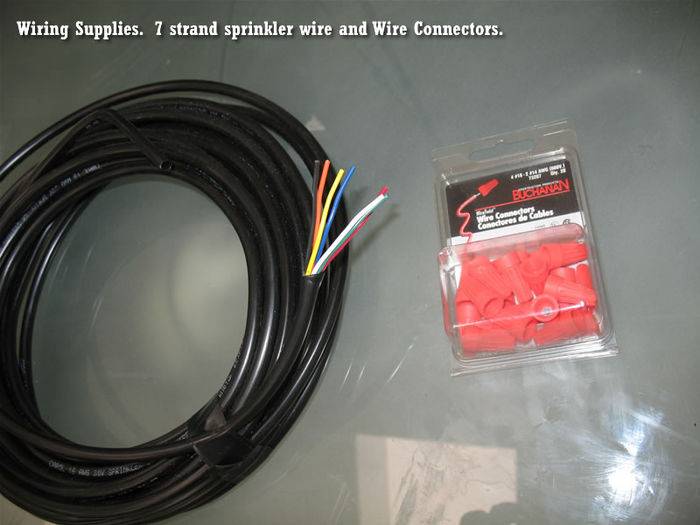
Here is the wiring supplies I needed
 .
.
Now one wire runs from each valve to the controller.
Then there is a master wire that completes the loop.
here is where the wires attach
Now you program the controller, plug in the pumps.
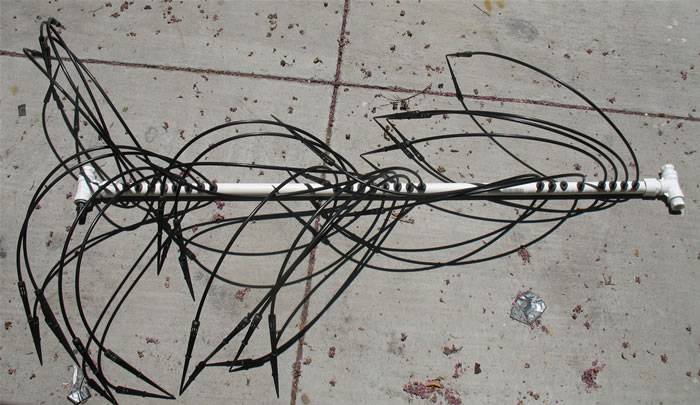
Then hook up the lines from the valves to the manifolds.
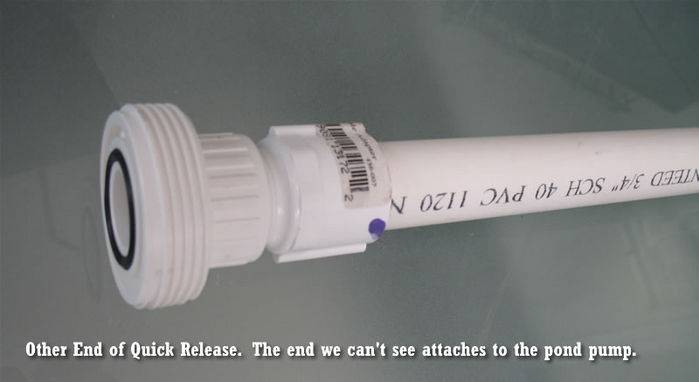
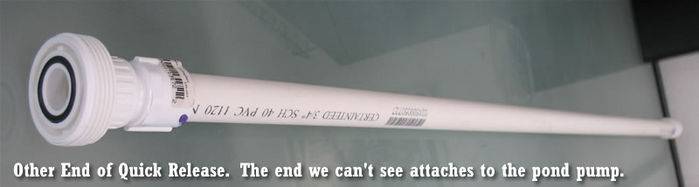
I used barbed fitting to run flexible line to the trays. The ultimate would be to run the 3/4" piping as close as you can get.
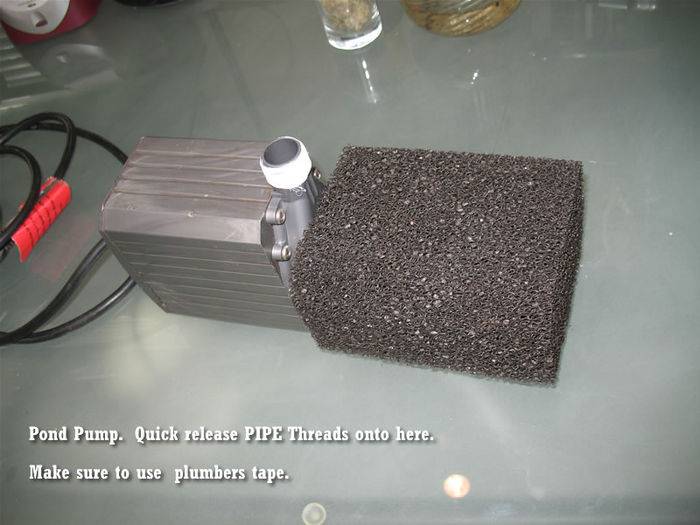
I used 1800 GPH pumps, I prefer the 2400 for the distance I am going from res to trays. That really sprays out the water from the drippers and provides even saturation.
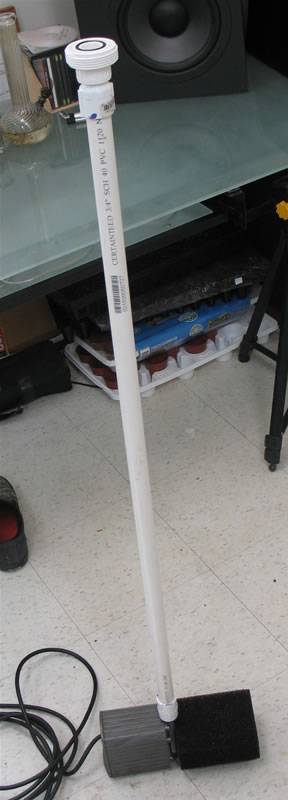
Ready to run!
I am in the middle of some things. Will take some more pics to show the whole thing in action. (and the lines all plumbed up)
Whew that was some work, going to take a break and then see what to add.
More info on valves.
The Home depot model of irrigation controller is the TORO ECXTRA. it has expandable zones and can be programmed on your computer.
It starts at 39.99 for the 4 zone models. Where the DIg retails for around 80 and will probably have to order.
Basically in irrigation terminology each valve is a zone.
I have 2 master valves then 4 zones.
I am not a irrigation expert so excuse me if I mis-quote. Just trying to share.
Hope this makes sense?
Any questions?
-Peace
I been working on a irrigation controller setup. I have now setup 2x and now ready to build mine and show you how it is done. This may get kinda complicated so please let me know if you have any questions.
This all based on "Hunter style" valves. You see this used for landscaping and yards.
But you do not see for indoor hydroponics often. Why? Because you need some way to control the pump Got it worked out.
why am I doing this?
Well usually you hook a pump up to a timer. And use that to control your irrigation/drip system.
Because most timers minimum setting is 60 seconds/1 minute.
Well this is too long and causes too much waste. Also doesnt work well for young plants (can get overwatered)
The other drawback is it cannot control multiple pumps and resevoirs.
For example: I want to flush one time a week with water.
Or I want to do a flush feed flush method of feeding.
If you look at methods used by commercial greenhouses you will see the water feed water method being used.
This allows you to pre-treat the medium with water before adding food. Therefore reducing the chance of burning the roots.
There is less salt buildup in rockwool and coco therefore reducing the need for flushing.
The drip lines are kept cleaner.
This will also allow you to use organic based food.
You can also program the irrigation controller to do a feed feed feed flush or however you can designs
Ok enough with some of the pros.
Let show how this works and is setup.
I am showing you this to help you save money and to show how to put it together and track down the parts.
If you are only using one res, you can get all the parts at home depot!!
I want to automate feeding and flushing. That is why I am using the Dig 5006-!P irrigation controller.
Also has many features that kick ass and will make things easier.
Ok here is the plan for my setup. This helps you to see the trays, valves, res and irrigation lines. You would change for the number of res's and number of trays you have.
Example of Drip setup. (see pico's tutorial on how to build PVC drip manifolds)
I suggest creating them with the ability to come apart. Make for easier cleaning and transporting.
DIG 5006-IP Irrigation controller. This is a commercial unit. Took me a while to locate it. I originally tried to do this setup with a toro unit from home depot. It works but will only control one master valve. (will explain more about that later)
Model 5006-IP
Application:
* Greenhouses and nursery
* Irrigation, cooling and propagation
Watering Schedules:
Watering schedules can be set according to four different programs:
# Standard watering cycle: 7 day calender
# Cyclical watering cycle: intervals from 1 to 30 days
# Repeat watering cycle: intervals from 1 to 23 hours
# Repeat watering cycle: intervals from 1 to 60 minutes with option to operate in limited time of the day AM or PM
# Repeat watering cycle: from 1 minute to 5 minutes in 1 minute interval
# Repeat watering cycle: from 15 minutes to 45 minutes in 15 minutes interval
Features:
* Independent program start time, run time and day of the week for each valve
* Four button with an integrated liquid crystal display (LCD)
* Easy to read AM/PM clock
* Four start times per day, per valve for a maximum of 24 start times for all valves (irrigation mode)
* Automatic short circuit valve detection isolates the shorted valve and continues irrigation cycle
* Internal circuit board eliminates the need for fuses or a circuit breaker
* Start time stacking prevents hydraulic overload
* Watering durations from 1 second up to 12 hours in 1 second increments
* 7 day customized programming schedule or intervals from 1 to 30 days
* Rain delay up to 30 days with auto restart
* Large clear display for easy programming
* Can operate two valves at the same time
* Waiting mode for third and fourth valves
* Three modes: automatic, semi automatic and manual
* One 9v alkaline battery backup to retain program memory during a power outage
* Digital display, low battery indicator
* Master valve remote pump start circuit
* Default program: after prolonged power interruption each station will operate for 10 minutes
* Can be programed under backup battery power without AC power connection
* Can be used with a rain sensor
I am using 2 60 gallon res. I measured the distance between them in order to build a manifold that houses the valves. I also added a threaded junction so I could use lids on the resevoirs.
There is one master valve for each res, then a valve for each tray/manifold that gets waterered/fed.
Ok here is the 2 res with manifold pumps, ready for wiring
here is a pump start relay. Basically a box with a relay inside. this will allwos the irrigation controller to turn on your pond pumps.
This is where it becomes confusing if you were to try and but the parts at landscape store. Well know you know what to ask for now. If your a electrical whiz I am sure you could build this for cheaper.
I took a extension cord and cut it in half. I then wired both ends into the pump start relay. The male end plugs into the wall. This supplies power to the relay. The female end comes out of the relay and that is where you attach your pond pumps. There is also a wire you will run to the irrigation controller. That is the white wire.
Here is the wiring supplies I needed
Now one wire runs from each valve to the controller.
Then there is a master wire that completes the loop.
here is where the wires attach
Now you program the controller, plug in the pumps.
Then hook up the lines from the valves to the manifolds.
I used barbed fitting to run flexible line to the trays. The ultimate would be to run the 3/4" piping as close as you can get.
I used 1800 GPH pumps, I prefer the 2400 for the distance I am going from res to trays. That really sprays out the water from the drippers and provides even saturation.
Ready to run!
I am in the middle of some things. Will take some more pics to show the whole thing in action. (and the lines all plumbed up)
Whew that was some work, going to take a break and then see what to add.
More info on valves.
The Home depot model of irrigation controller is the TORO ECXTRA. it has expandable zones and can be programmed on your computer.
It starts at 39.99 for the 4 zone models. Where the DIg retails for around 80 and will probably have to order.
Basically in irrigation terminology each valve is a zone.
I have 2 master valves then 4 zones.
I am not a irrigation expert so excuse me if I mis-quote. Just trying to share.
Hope this makes sense?
Any questions?
-Peace


")


