O
otherwhitemeat
Soooooooo....my first cab was an all metal locker thingy that was in the basement of my new house. My first attempt was pretty sub par, so I picked up some things as I went, solved some problems as I grew and here it is: cab 2.0!!!! Please provide any feedback or insights. I'll do my best to update it from time to time with new flower pics, harvest shots, and updates to the design.
First of all, here's cab 1.0, an amateurish attempt to take advantage of a box of gifted ballasts and bulbs. I bought a Can Fan, filter, and some Mylar and used a gifted 175 MH for veg, and a 250 hps for flowering. Bagseed NYC uptown weed (haze?). FFOF soil, PBP nutes, tried SCROGGING my last few runs; not crazy about it. Started some mothers/clones and quickly ran out of space.

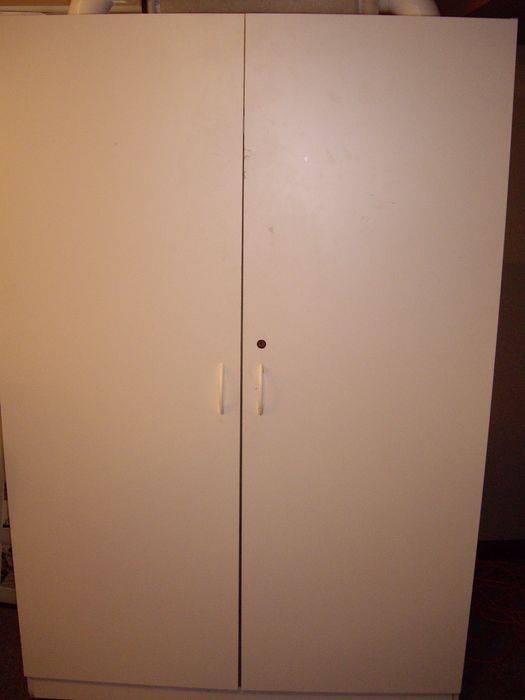
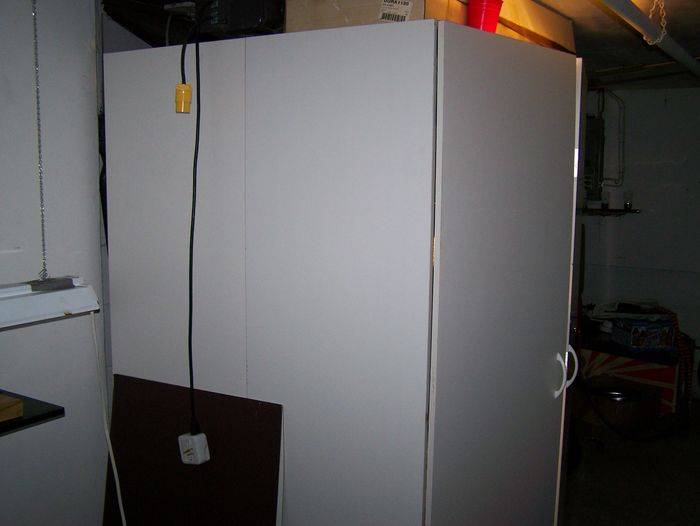
Here's cab 2.0 from the outside, I picked it up from Craig's List for $40. Standard particle board and melamine cheapo design. Outside dimensions are 4'W x 2'D x 6'H

First up, some heavy duty casters mounted to 2x4s to make it easier to service the filters in the back, clean, upgrade, etc

One of the first obstacles to overcome was that the 'attic' space is way to big, reducing the headroom for the future female inhabitants. I pretty much disassembled the whole thing and expanded the center divider by adding another piece of melamine fiberboard, and using wooden dowels and Gorilla glue to hold it all together. I used ratchet straps from truck to clamp it all together while it dried. After it was dried, I predrilled and moved the metal pins up to accomodate the higher shelf height

Here's a closeup of the 'extension'

Then, I replaced the cardboard rear panel with a sheet of 5/8" plywood. I painted the inside flat white and caulked the seams. To keep everything neat and clean, I used coarse thread drywall screws (1" length) and predrilled and countersunk every hole. This gave the unit some sturdiness

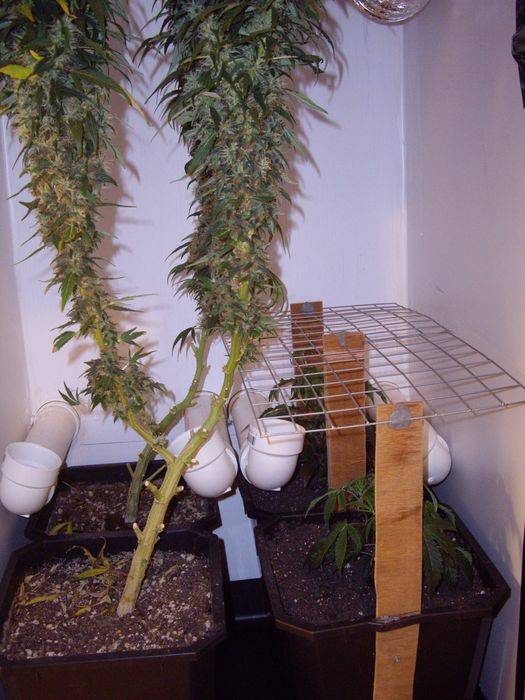
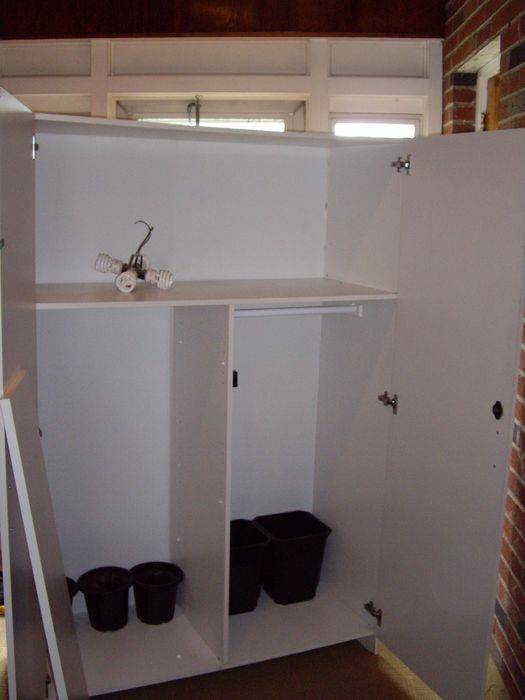
Here's the general plan: flowering on the right, veg/clones/mothers on the left. Very soon, I am going to modify the veg room, moving the CFLs to the lower space and adding the 175MH for a 1-2 week veg period.

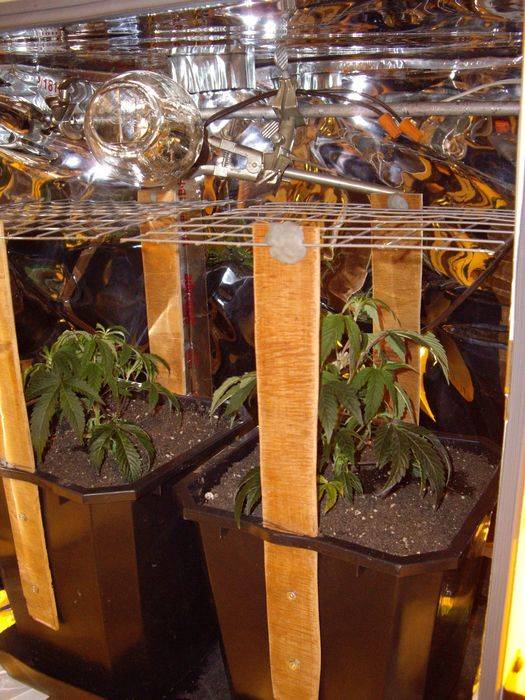
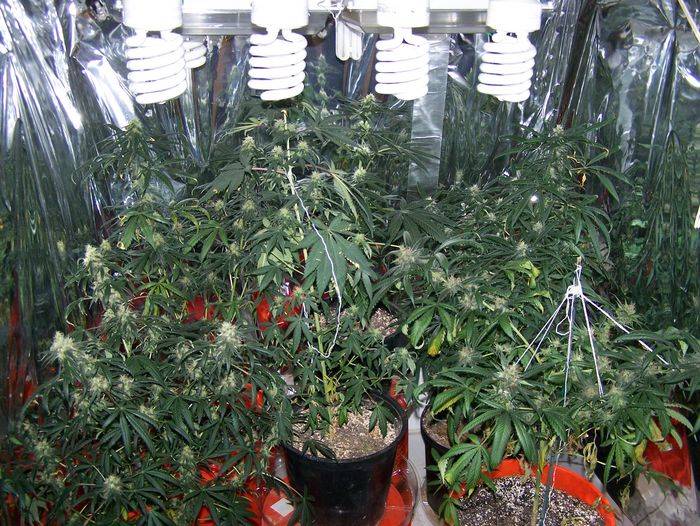
Next up, I added some drawer slides to make moving the flowering girls a bit easier. You can also see the PVC passive intakes in this photo. I sealed all the doors with epdm weatherstipping from Lowe's and took my time to ensure no light leaks. I used some old stockings to cap the pvc intsakes and keep bugs and stuff out. When the door is closed the fan sucks air through the cooltube and pretty much blasts the colas with fresh air from the floor level which it discharges at the top of the room(note the three VERY stretchy sativa colas)

On my last run, I did a SCROG...but I plan on modular SCROGging from now on so that I can have some variety in my cab. I want to have a few different varieties, but I only have the space for 4 in flower at any time. I will update pics soon on my mod SCROG idea....but I built two and hope the idea will work.
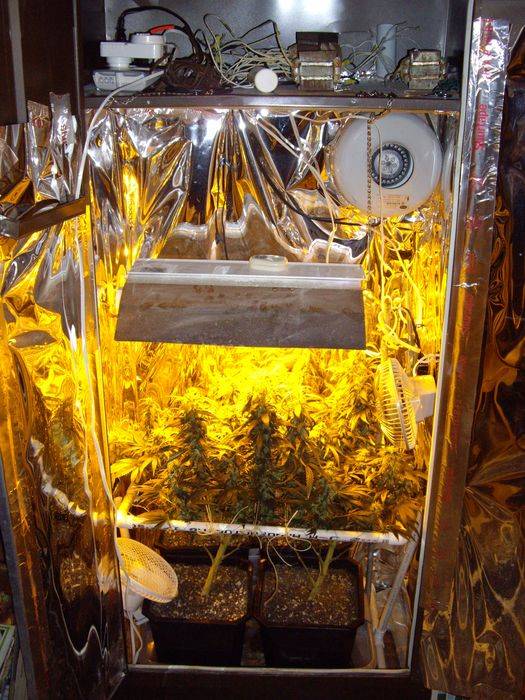
Next up, my pride and joy...a DIY cooltube for around $30.
-$8 for hurricane lamp glass at Michael's crafts
-$5 for some worm clamps
-$2 for pipe hanging strapping, from plumbing dept. at Lowe's
-$8 for the 4" rubber Clay Pipe Coupling, also from Lowe's plumbing dept
-$6 flexible dryer hose
Then, I just added my 250 HPS, and affixed the whole enchilada to the reflector pan. BAM! My canopy temps are holding at 78 F degrees now, before the cooltube I was lucky to get them below 85 F.

I shared this little secret on an earlier thread, but I used old inner tubes from my mountain bike to bridge the hinge edge on the door. And gorilla tape to hold it all together. All other edges got a double treatment of weather stripping.

Two Can Fans keep it ventilated and each discharges through the roof to it's own dedicated filter. These are not mounted in any way, I just set the fans on some rubber pipe couplings to deaden vibrations. Standard 4" stovepipe links it together. On the roof (not really pictured) I ran the stovepipe into 90 deg PVC elbows and right to the filters. I also tacked a wide power strip to the wall to hold my timers and plugs.

I kinda ran out of PVC and just decided to drill some holes in each shelf for the clone/veg/mother cab. Very low tech, but it works. Since the casters keep the cab raised about an inch off the floor, there is quite a rush of air coming in and washing over the plants.

Next up:
-build a facade on the roof and line it with polystrene foam, carpeting, mdf, etc to quiet the sound a bit. Make it look like boxes. It doesn't have to be superstealth as the cab itself sits in a basement utility room, but it sounds quite loud with the dual fan setup.
-Line the floor on the veg/clone/mother cab with a furnace filter to keep out dust and bugs
-Remodel the veg/clone/mother area a bit to accomodate the 175 MH and mod SCROGs
-Seal off door hinge on v/c/m area (hafta to get a flat on my mtn. bike first!)
-Finish mod SCROGs
-Get seeds (Papaya, Big Bug, Ak48) from safe addy and start some new girls!
Would love to hear your questions, feedback, and comments!
First of all, here's cab 1.0, an amateurish attempt to take advantage of a box of gifted ballasts and bulbs. I bought a Can Fan, filter, and some Mylar and used a gifted 175 MH for veg, and a 250 hps for flowering. Bagseed NYC uptown weed (haze?). FFOF soil, PBP nutes, tried SCROGGING my last few runs; not crazy about it. Started some mothers/clones and quickly ran out of space.
Here's cab 2.0 from the outside, I picked it up from Craig's List for $40. Standard particle board and melamine cheapo design. Outside dimensions are 4'W x 2'D x 6'H
First up, some heavy duty casters mounted to 2x4s to make it easier to service the filters in the back, clean, upgrade, etc

One of the first obstacles to overcome was that the 'attic' space is way to big, reducing the headroom for the future female inhabitants. I pretty much disassembled the whole thing and expanded the center divider by adding another piece of melamine fiberboard, and using wooden dowels and Gorilla glue to hold it all together. I used ratchet straps from truck to clamp it all together while it dried. After it was dried, I predrilled and moved the metal pins up to accomodate the higher shelf height
Here's a closeup of the 'extension'

Then, I replaced the cardboard rear panel with a sheet of 5/8" plywood. I painted the inside flat white and caulked the seams. To keep everything neat and clean, I used coarse thread drywall screws (1" length) and predrilled and countersunk every hole. This gave the unit some sturdiness

Here's the general plan: flowering on the right, veg/clones/mothers on the left. Very soon, I am going to modify the veg room, moving the CFLs to the lower space and adding the 175MH for a 1-2 week veg period.

Next up, I added some drawer slides to make moving the flowering girls a bit easier. You can also see the PVC passive intakes in this photo. I sealed all the doors with epdm weatherstipping from Lowe's and took my time to ensure no light leaks. I used some old stockings to cap the pvc intsakes and keep bugs and stuff out. When the door is closed the fan sucks air through the cooltube and pretty much blasts the colas with fresh air from the floor level which it discharges at the top of the room(note the three VERY stretchy sativa colas)

On my last run, I did a SCROG...but I plan on modular SCROGging from now on so that I can have some variety in my cab. I want to have a few different varieties, but I only have the space for 4 in flower at any time. I will update pics soon on my mod SCROG idea....but I built two and hope the idea will work.
Next up, my pride and joy...a DIY cooltube for around $30.
-$8 for hurricane lamp glass at Michael's crafts
-$5 for some worm clamps
-$2 for pipe hanging strapping, from plumbing dept. at Lowe's
-$8 for the 4" rubber Clay Pipe Coupling, also from Lowe's plumbing dept
-$6 flexible dryer hose
Then, I just added my 250 HPS, and affixed the whole enchilada to the reflector pan. BAM! My canopy temps are holding at 78 F degrees now, before the cooltube I was lucky to get them below 85 F.

I shared this little secret on an earlier thread, but I used old inner tubes from my mountain bike to bridge the hinge edge on the door. And gorilla tape to hold it all together. All other edges got a double treatment of weather stripping.

Two Can Fans keep it ventilated and each discharges through the roof to it's own dedicated filter. These are not mounted in any way, I just set the fans on some rubber pipe couplings to deaden vibrations. Standard 4" stovepipe links it together. On the roof (not really pictured) I ran the stovepipe into 90 deg PVC elbows and right to the filters. I also tacked a wide power strip to the wall to hold my timers and plugs.

I kinda ran out of PVC and just decided to drill some holes in each shelf for the clone/veg/mother cab. Very low tech, but it works. Since the casters keep the cab raised about an inch off the floor, there is quite a rush of air coming in and washing over the plants.

Next up:
-build a facade on the roof and line it with polystrene foam, carpeting, mdf, etc to quiet the sound a bit. Make it look like boxes. It doesn't have to be superstealth as the cab itself sits in a basement utility room, but it sounds quite loud with the dual fan setup.
-Line the floor on the veg/clone/mother cab with a furnace filter to keep out dust and bugs
-Remodel the veg/clone/mother area a bit to accomodate the 175 MH and mod SCROGs
-Seal off door hinge on v/c/m area (hafta to get a flat on my mtn. bike first!)
-Finish mod SCROGs
-Get seeds (Papaya, Big Bug, Ak48) from safe addy and start some new girls!
Would love to hear your questions, feedback, and comments!
Last edited:


") Watch (but please don't laugh; I'm a politician not a mathmetician)...
Watch (but please don't laugh; I'm a politician not a mathmetician)...