
Country Mon
Active member
Hey, all -
There are many different ways to take clones that work well. Here's mine. When done exactly as described I consistently get a better than 99% success rate, even with very difficult to root strains. I've used this technique for years now.
Hopefully it will help you if you are having troubles cloning. Feel free to PM me with specific questions, though I don't pass through here very regularly. Keep in mind that changing any single factor of the system described here may provide different results for you. Each individual factor adds up to a reliable system that produces exactly the numbers of clones needed with no extras - unless you want them.
So, an overview - what to do, what not to do, some myths crushed
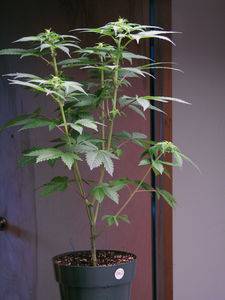
1) Always take your cuttings from the lowest branches on the plant possible. You want slightly woody ones, not the softer top branches. This is especially true with seedlings, which usually have softer stems and are more difficult to root due to their young age. Top branches often will still root okay, but you will be more at risk of losing these. Take some extras if tops are all you have to work with.
2) On the branch you choose, don't worry about whether or not you have a node or two in the "root zone". It isn't at all necessary. I have never had a cutting with no nodes not take root. This myth applies to some other plants, but not cannabis.
3) Likewise, you don't need to rushrushrush the freshly cut branch into water or clone solution; embolisms (where air enters the end of the cut) only happen with soft upper branches or branches from very young plants. Don't waste time of course, but you don't need to panic either. This myth carries over from working with other plants as well.
4) Many experienced growers insist on the importance of your scissors being sterile. Hmm. That's your call. I have never sterilized scissors (in 15 years and over 1000 clones) and I have never seen a problem. Sharp is far more important than clean in my opinion.
5) Very important: DON'T VENTILATE your new cuttings for the first 10 days, and only minimally after that until they are transplanted. Mist every 12 hours for the first 5 days, then daily after that. Cuttings breathe/transpire much less than rooted plants do; very high humidity is most important. They will still get fresh air twice a day when you mist. People love to argue about this, but again: I never lose clones. So I don't argue about technique, either.
6) Absolutely DO NOT use anything but water on cuttings until they are fully rooted and transplanted into either soil or bubblers. No fertilizer, no B1, no VitaStart, no Superthrive, NOTHING. PERIOD. No exceptions. Anti-wilt spray is not necessary. This is another thing that people really love to argue about.
Instead of trying to give your new cuttings fertilizer/additives that they can't metabolize yet because they have no roots - and as a result stunting/burning them - instead you should make a serious effort to have your parent plants in excellent health before taking cuttings. This means giving them a feeding 1 week prior to your clone taking date. A healthy branch has all it needs to keep it going until it has fully rooted, and it will root faster. I can't emphasize this point enough.
I take this minimalist fertilizer approach one step farther after transplanting, and go right into an organic soil mix and only give them Liquid Karma for the first 2 weeks. The key thing to remember is that a plant should only be fed and watered what it's roots can intake. Bigger roots call for more fertilizer and more water; small roots call for less. No roots need no fertilizer with cuttings from healthy plants.
After some roots appear (two weeks maximum), a good organic soil has everything a young rooted cutting needs for the first two weeks. Exceptions might be placing a rooted clone into bubblers; these I give a 1/2 strength Lucas Formula for the first 7-10 days; or soilless mix; to which you will need some ferts added at about 1/4 strength. This is a whole different topic.
By the same logic, it is important not to overwater newly transplanted cuttings in soil. Give them at most four ounces of water with Liquid Karma every couple days until new growth appears; this helps to stimulate root growth. Wait for the new growth. It is essential for cannabis plants to dry out between waterings when in soil or soilless mix. Overwatering is the single biggest reason for stunted growth. Soil and hydro are not the same with regards to this; with soil the potential for root rot is much higher.
7) Proper temperature should be maintained at all times. Don't guess; get a thermometer in there. This detail is very important. A temperature of 78-82 continuous degrees is optimum, and 75-85 the range limit. I give my clones 24/7 florescent lighting.
---------------------------------
Supplies for my clone-taking process:
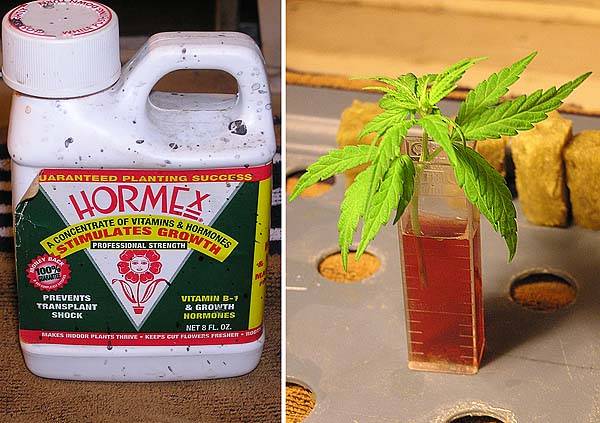
1) liquid clone solution (I use Vita Start). Personally I have not had good results with gels. If you have, you can try substituting. Also, a shot glass or something similar for dipping the cuttings in this solution.
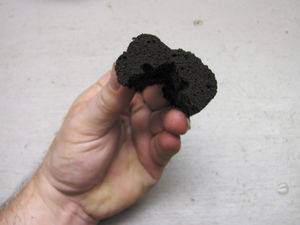
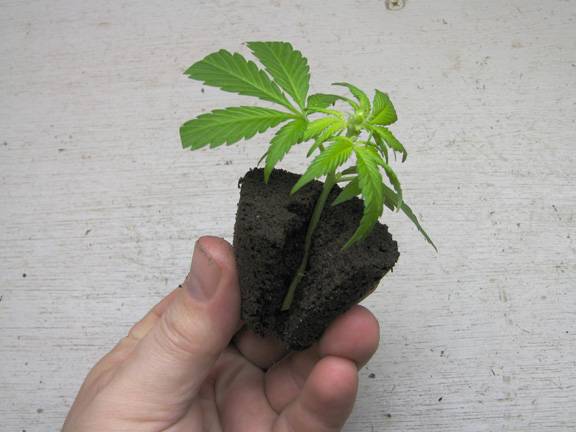
2) RapidRooter plugs! These are fantastic, well worth the money. I tear them almost in half, so they look somewhat like a Pac Man from the top when you open them up to receive the cutting. (See photos below.) The holes that are pre-drilled in the plugs are basically worthless. I have also noticed that excessive bending of the stem of a cutting can inhibit root growth, so shoving the stem into that hole is probably a bad idea.
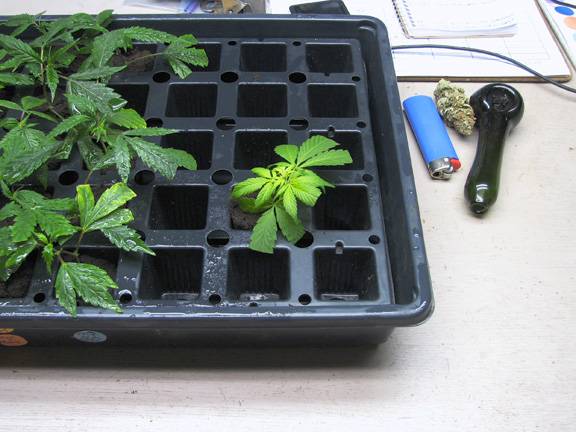
3) a clone tray with slots for the plugs, and a tall clear dome. RapidRooter sells a great one with plugs already in it; then you just replace the plugs for the next round of clones. Close the vent holes at the top.
If you can't find RapidRooters locally I can only suggest that you pay very close attention to the moisture level of whatever you do use. Maybe you can order plugs over the internet; they are really great to use. Down To Earth has a version, but they are a bit more expensive.
---------------------------------
So, the process:
1) Pour a shot-glass about 3/4 full of clone solution. Arrange a sharp pair of scissors, your plants, and a spray bottle of water nearby.
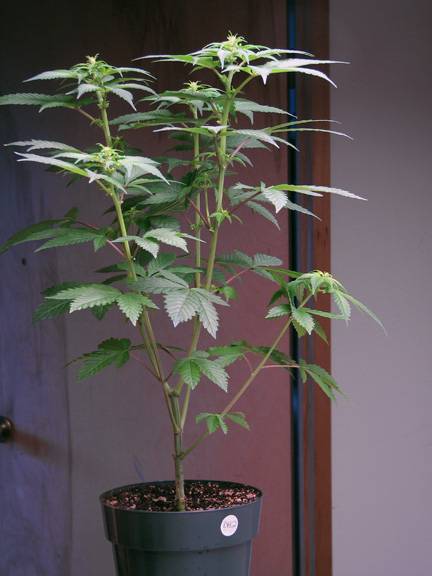
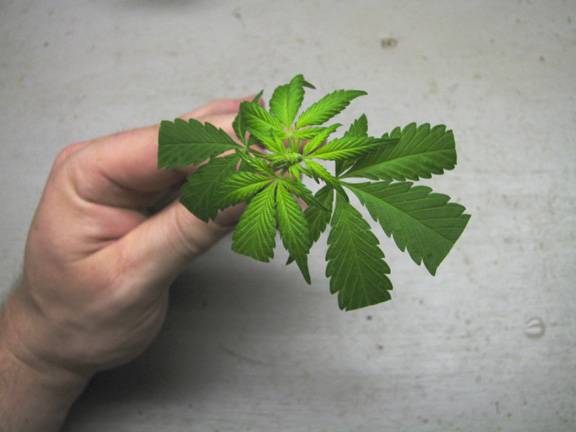
2) Select a lower branch that has 2-3 good leaves on it. (See photos). Many people believe that you should strip most of the top leaves away; I disagree. You will also want enough stem to extend to within 1/8 inch of the plug's bottom. Trim off any excess leaves, and if you want, trim leaf tips as shown. (Why trim leaf tips? This step is probably optional. I hated doing this in the beginning, but I have gotten better results doing it than not doing it, for reasons that completely escape me. It may be that the cutting responds in some way to the tips being trimmed; I'm not sure.) Lastly, very lightly rough up one side of the stem that will go into the rooting solution with the edge of the scissors. Don't go wild, just break the skin slightly on one side. One quick pass with the scissor edge will do it.
3) Put the cutting into the clone solution. I let them sit for anywhere from 30 seconds to 2 minutes, the longer time is used for more woody stems. While you wait, prep the plug by first getting the moisture right. To do this, you want the plug to be squishy but not saturated or dripping; you should squeeze out the excess moisture to get the ideal moisture level just right. Sometimes they are perfect right out of the bag, but not always.
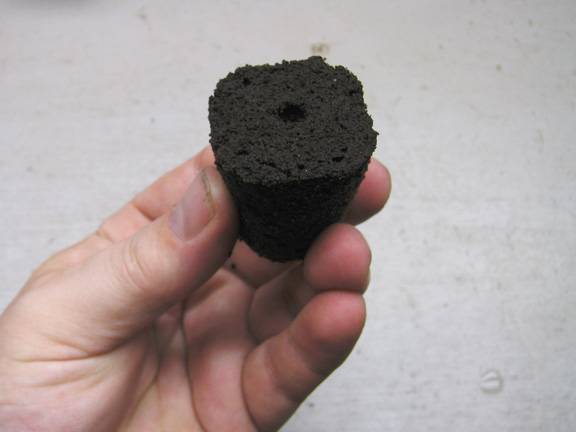
4) After that, tear the plug almost in half as shown in the photo. Spread the plug open and carefully position the cutting in it so it will be fully sandwiched between both sides (full contact along the full length), and so it is just covered up at the bottom. You don't want it sticking out the bottom. Push this plug into the tray slot firmly so it maintains pressure on the entire stem. Repeat. Don't worry about how you will get the split plugs out again. After they are fully rooted, you just slip a ballpoint pen down one corner and lift up. They pop right out.
5) Mist the entire group. Don't overdo it; they just need to be moist, and you don't want to accumulate water in the tray bottom. You will do this misting every 12 hours for the first 5 days, and every 24 hours after that.
That's it. I usually see roots in 7-10 days, and the slowest strains usually always root by day 14. Hope this provides some helpful tips to those having trouble.


There are many different ways to take clones that work well. Here's mine. When done exactly as described I consistently get a better than 99% success rate, even with very difficult to root strains. I've used this technique for years now.
Hopefully it will help you if you are having troubles cloning. Feel free to PM me with specific questions, though I don't pass through here very regularly. Keep in mind that changing any single factor of the system described here may provide different results for you. Each individual factor adds up to a reliable system that produces exactly the numbers of clones needed with no extras - unless you want them.
So, an overview - what to do, what not to do, some myths crushed
1) Always take your cuttings from the lowest branches on the plant possible. You want slightly woody ones, not the softer top branches. This is especially true with seedlings, which usually have softer stems and are more difficult to root due to their young age. Top branches often will still root okay, but you will be more at risk of losing these. Take some extras if tops are all you have to work with.
2) On the branch you choose, don't worry about whether or not you have a node or two in the "root zone". It isn't at all necessary. I have never had a cutting with no nodes not take root. This myth applies to some other plants, but not cannabis.
3) Likewise, you don't need to rushrushrush the freshly cut branch into water or clone solution; embolisms (where air enters the end of the cut) only happen with soft upper branches or branches from very young plants. Don't waste time of course, but you don't need to panic either. This myth carries over from working with other plants as well.
4) Many experienced growers insist on the importance of your scissors being sterile. Hmm. That's your call. I have never sterilized scissors (in 15 years and over 1000 clones) and I have never seen a problem. Sharp is far more important than clean in my opinion.
5) Very important: DON'T VENTILATE your new cuttings for the first 10 days, and only minimally after that until they are transplanted. Mist every 12 hours for the first 5 days, then daily after that. Cuttings breathe/transpire much less than rooted plants do; very high humidity is most important. They will still get fresh air twice a day when you mist. People love to argue about this, but again: I never lose clones. So I don't argue about technique, either.
6) Absolutely DO NOT use anything but water on cuttings until they are fully rooted and transplanted into either soil or bubblers. No fertilizer, no B1, no VitaStart, no Superthrive, NOTHING. PERIOD. No exceptions. Anti-wilt spray is not necessary. This is another thing that people really love to argue about.
Instead of trying to give your new cuttings fertilizer/additives that they can't metabolize yet because they have no roots - and as a result stunting/burning them - instead you should make a serious effort to have your parent plants in excellent health before taking cuttings. This means giving them a feeding 1 week prior to your clone taking date. A healthy branch has all it needs to keep it going until it has fully rooted, and it will root faster. I can't emphasize this point enough.
I take this minimalist fertilizer approach one step farther after transplanting, and go right into an organic soil mix and only give them Liquid Karma for the first 2 weeks. The key thing to remember is that a plant should only be fed and watered what it's roots can intake. Bigger roots call for more fertilizer and more water; small roots call for less. No roots need no fertilizer with cuttings from healthy plants.
After some roots appear (two weeks maximum), a good organic soil has everything a young rooted cutting needs for the first two weeks. Exceptions might be placing a rooted clone into bubblers; these I give a 1/2 strength Lucas Formula for the first 7-10 days; or soilless mix; to which you will need some ferts added at about 1/4 strength. This is a whole different topic.
By the same logic, it is important not to overwater newly transplanted cuttings in soil. Give them at most four ounces of water with Liquid Karma every couple days until new growth appears; this helps to stimulate root growth. Wait for the new growth. It is essential for cannabis plants to dry out between waterings when in soil or soilless mix. Overwatering is the single biggest reason for stunted growth. Soil and hydro are not the same with regards to this; with soil the potential for root rot is much higher.
7) Proper temperature should be maintained at all times. Don't guess; get a thermometer in there. This detail is very important. A temperature of 78-82 continuous degrees is optimum, and 75-85 the range limit. I give my clones 24/7 florescent lighting.
---------------------------------
Supplies for my clone-taking process:
1) liquid clone solution (I use Vita Start). Personally I have not had good results with gels. If you have, you can try substituting. Also, a shot glass or something similar for dipping the cuttings in this solution.
2) RapidRooter plugs! These are fantastic, well worth the money. I tear them almost in half, so they look somewhat like a Pac Man from the top when you open them up to receive the cutting. (See photos below.) The holes that are pre-drilled in the plugs are basically worthless. I have also noticed that excessive bending of the stem of a cutting can inhibit root growth, so shoving the stem into that hole is probably a bad idea.
3) a clone tray with slots for the plugs, and a tall clear dome. RapidRooter sells a great one with plugs already in it; then you just replace the plugs for the next round of clones. Close the vent holes at the top.
If you can't find RapidRooters locally I can only suggest that you pay very close attention to the moisture level of whatever you do use. Maybe you can order plugs over the internet; they are really great to use. Down To Earth has a version, but they are a bit more expensive.
---------------------------------
So, the process:
1) Pour a shot-glass about 3/4 full of clone solution. Arrange a sharp pair of scissors, your plants, and a spray bottle of water nearby.
2) Select a lower branch that has 2-3 good leaves on it. (See photos). Many people believe that you should strip most of the top leaves away; I disagree. You will also want enough stem to extend to within 1/8 inch of the plug's bottom. Trim off any excess leaves, and if you want, trim leaf tips as shown. (Why trim leaf tips? This step is probably optional. I hated doing this in the beginning, but I have gotten better results doing it than not doing it, for reasons that completely escape me. It may be that the cutting responds in some way to the tips being trimmed; I'm not sure.) Lastly, very lightly rough up one side of the stem that will go into the rooting solution with the edge of the scissors. Don't go wild, just break the skin slightly on one side. One quick pass with the scissor edge will do it.
3) Put the cutting into the clone solution. I let them sit for anywhere from 30 seconds to 2 minutes, the longer time is used for more woody stems. While you wait, prep the plug by first getting the moisture right. To do this, you want the plug to be squishy but not saturated or dripping; you should squeeze out the excess moisture to get the ideal moisture level just right. Sometimes they are perfect right out of the bag, but not always.
4) After that, tear the plug almost in half as shown in the photo. Spread the plug open and carefully position the cutting in it so it will be fully sandwiched between both sides (full contact along the full length), and so it is just covered up at the bottom. You don't want it sticking out the bottom. Push this plug into the tray slot firmly so it maintains pressure on the entire stem. Repeat. Don't worry about how you will get the split plugs out again. After they are fully rooted, you just slip a ballpoint pen down one corner and lift up. They pop right out.
5) Mist the entire group. Don't overdo it; they just need to be moist, and you don't want to accumulate water in the tray bottom. You will do this misting every 12 hours for the first 5 days, and every 24 hours after that.
That's it. I usually see roots in 7-10 days, and the slowest strains usually always root by day 14. Hope this provides some helpful tips to those having trouble.


 . nice technique though. i use gels and they work pretty well i guess, have only tried cloning a few times though, give this one a go around next time though.
")

 Took me 3-4 tries just to get to 10%. Remember kiddies, NEVER give up!

