a question - as said in my prior, my new bbq gets up to 625 , way hotter then my home oven... BUT last week made a bunch of pizza's , and the bottoms were a bit burnt , b4 the cheese was melted - i lowered the temp. and put the pizza on a pan with holes at the bottom as i have seen some pizza joints bake on em - any suggestions ??

-
Happy Birthday ICMag! Been 20 years since Gypsy Nirvana created the forum! We are celebrating with a 4/20 Giveaway and by launching a new Patreon tier called "420club". You can read more here.
-
Important notice: ICMag's T.O.U. has been updated. Please review it here. For your convenience, it is also available in the main forum menu, under 'Quick Links"!
You are using an out of date browser. It may not display this or other websites correctly.
You should upgrade or use an alternative browser.
You should upgrade or use an alternative browser.
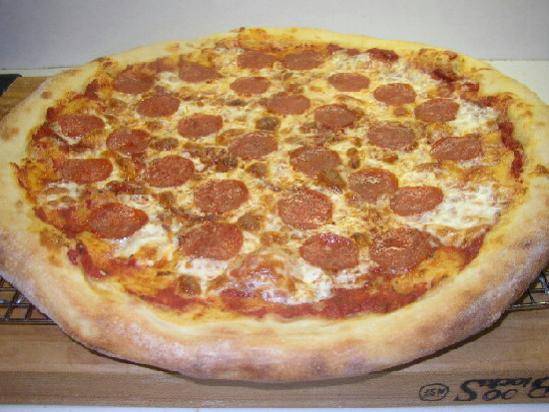
PIZZA...
- Thread starter Illuminate
- Start date
what i did in the weber was to add some bricks (covered with alum foil for cleanliness) under the stone- i think it helps with a more even heating as the stone is not sitting on the grates, and the temp is higher nearer to the top of the dome - it seems to help the bottom not burning b4 the top is cooked
also i make my own dough, and i delete about 2pct of the flour called for in the recipe, and add the 2pct back with diastatic malt , which suppose to give the dough a better rise... i've been making pizza's for 15yrs and still in the experimental stage...
also i make my own dough, and i delete about 2pct of the flour called for in the recipe, and add the 2pct back with diastatic malt , which suppose to give the dough a better rise... i've been making pizza's for 15yrs and still in the experimental stage...
a question - as said in my prior, my new bbq gets up to 625 , way hotter then my home oven... BUT last week made a bunch of pizza's , and the bottoms were a bit burnt , b4 the cheese was melted - i lowered the temp. and put the pizza on a pan with holes at the bottom as i have seen some pizza joints bake on em - any suggestions ??
Buy a pizza stone and that will help keep the underside for burning for some minutes to give the top time to melt. You could also try placing the pizza near the top of the oven si that the heat is more even and not most of it coming straight from underneath.
now I seen that you found the fix already but this one is great for people using a home gas oven.
the bricks to raise the stone off the grates works pretty well... still adjusting as its a 3 burner weber plus a sear burner, hence the 625+ temp - made a pizza b4, n the bottom was toooo well done.... getting close...
we have a friend who's son-in-law runs '2' pizza places- i asked for his dough recipe, wouldn't give it up... told him the ingredients i'm using, all he says is... yep thats the rite ingred's, but wouldn't tell me the amount of each to use - its not like i'm going to open a pizza place next to his... i'm 200miles away.... what a dick... but fuk him.... i went online to youtube, and follow a guy named vito.... he has a bunch of video's, and i tweated his newest one from 2021, using a bit of diastatic malt, and the dough/crust come out great... along with tomato magic + other sauce... and ofcourse 'grande' whole milk mozz.... i'm pretty close to a real good pie...
i needed grande 2 weeks ago, and they had no east coast blend, 6 5lb bags, so has to buy loafs... '8' 7lb loafs- thats a lot of cheese...
Best to use high gluten flour. I prefer NY style pizza myself.
Good detailed recipe here:
12-inch Lehmann NY Style Dough Recipe
100%, Bread flour, 7.15 oz. (202.03 g.), (1 1/2 c. plus 2 T. plus 5/8 t.)*
63%, Water (at around 100 degrees F), 4.50 oz. (127.65 g.), (1/2 c. plus 2 t.)
1%, Oil, 0.07 oz. (2.03 g.), (a bit less than 1/2 t.)
1.75%, Salt (table salt), 0.13 oz. (3.55 g.), (a bit over 5/8 t.)
0.40%, IDY (instant dry yeast), 0.03 oz. (0.81 g.), (a bit over 1/4 t.)
Total dough weight = 11.88 oz. (336.66 g.)
Thickness factor (TF) = 0.105
*note: Tom has written is that he recommends that sugar be used in the NY style dough only when
the cold fermentation period is to exceed two or three days. A typical percent might be 1-2%.
*Measure out the flour by first stirring the flour in the flour container and then repeatedly lifting
the flour from the flour container into the measuring cup(s) and leveling off the flour in the
measuring cup(s) with a flat edge (this is the "Textbook" method)
A few comments on the formulation are in order. First, since I did not have any bread flour on
hand, I weighed an equal amount of King Arthur Sir Lancelot high-gluten flour instead. If you are
using bread flour, that will be fine and the amount you will want to use should be close to what I
have set forth above. If you have a choice, I would go with the King Arthur brand of bread flour.
It is a very high quality bread flour and my favorite among the brands I have tried. Second, I
increased the amount of yeast from the levels I usually recommend, from around 0.25% to
0.40%. That was done to compensate for the fact that cold weather is upon us in most parts of
the country and one way to compensate for lower kitchen temperatures is to use more yeast (in
the summer, I would use 0.25%, or about 1/5 t. in the above formulation). The higher amount of
yeast will help the dough to ferment a bit faster and better. Third, I have specified a water
temperature of 100 degrees F. That is another way to compensate for lower kitchen
temperatures. FYI, 100 degree water, which is what I have specified above, is water that is
slightly warm to the touch. If you have a thermometer to measure the temperature of the
water, so much the better. (Note: During warmer weather, a lower water temperature should
be used. Depending on the part of the country, it might be as low as 50 degrees F, and possibly
even lower in really hot climates.) Fourth, I used a thickness factor of 0.105, which is a measure
of crust thickness that is characteristic of a NY "street" style. This is purely a technical matter for
those who wish to control the final crust thickness. Finally, I posted gram weights also. That is
for those members who prefer to work in grams rather than ounces.
Since you are working in volumes, it is important that you measure out the flour as accurately as
you can. The way I measure out flour by volume is to start by stirring the flour in the bag of flour
to loosen up the flour a bit. I then use a standard tablespoon to scoop flour out of the bag into
my measuring cup(s). I don't shake the measuring cup or tamp it. I then level off the top of the
measuring cup using a flat edge, such as the flat back edge of a knife. I also level off measuring
spoons. When measuring out water, you should check the water level marking on the measuring
cup at eye level.
As for making the dough itself, this is the sequence of steps I recommend you use to practice the
recipe posted above: 1) Add the IDY to the flour in a bowl and stir to uniformly disperse the IDY
in the flour. 2) Put the water into the bowl of the stand mixer, add the salt, and, using a spoon
or spatula, stir for about 30 seconds to a minute to dissolve the salt in the water. 3) Using the
stir or 1 speed of the mixer, and with the dough hook attached, gradually add the flour mixture
to the water in the bowl. Once the mixer is turned on, I usually use a spatula to help direct the
flour/dough into the path of the dough hook so that the flour better incorporates the water. You
can use the spatula while the machine is running, if you are careful, or you can stop the machine
from time to time to do it. Some people use the paddle attachment for this step and later switch
to the dough hook for the more heavy duty kneading. This approach is perfectly fine and, in fact,
is my preferred method. The initial mixing/kneading step will usually take a minute or two in a
standard home stand mixer. 4) Once the flour has been hydrated (absorbed the water) and a
rough dough ball has formed, and with the dough hook attached, add the oil and knead that in,
at the 1 speed, until it has been fully incorporated into the dough. Since the amount of dough
involved is fairly small (about 3/4 lb.), don't be afraid to stop the mixer from time to time,
especially if the oil is not being fully taken up into the dough, and help the dough along by doing
some hand kneading to get everything to come together better. Stand mixers are just not that
great at kneading small amounts of dough. 5) Once the dough has incorporated the oil, continue
kneading the dough, at 1 or 2 speed, until the dough takes on a smooth texture and consistency
and is elastic. It should be a bit tacky--not wet or dry. Don't be too concerned about elapsed
times. The condition of the dough is more important than the elapsed times. At this point, and
especially because you will be working in volumes rather than weight, it may be necessary to
add a bit more flour or a bit more water to achieve the desired finished condition. When making
such adjustments, I usually add flour or water a half-teaspoon at a time.
Once the dough looks just about right, remove it from the mixer bowl and knead it by hand for
about 30 seconds to a minute. This will give you a good "feel" for the dough and allow you to
shape it a bit before it goes into the container where it will spend one or more days. If the
dough feels a little bit sticky at this point, the final hand kneading will also usually cause the
stickiness to disappear, so don't be tempted to overcome it by adding more flour. You should
lightly coat the finished dough ball with a bit of oil. The container itself can take many different
forms. It can be a normal kitchen bowl (which will have to be covered during fermentation), a
zip-type plastic storage bag, a metal container, plastic containers (e.g., Rubbermaid), glass bowls
(e.g., Pyrex), or even an empty bread bag with the end twisted and folded under. To get the
dough ball to cool down fast and remain cool, one of my favorite storage containers to do this is
a metal tin with a tight fitting lid. A zip-type container has the advantage of being compact and
requiring little storage space. Whichever form of container you elect to use, it should be placed
in the refrigerator, preferably toward the back or near the bottom away from the door. For a
Lehmann NY style dough, the time in the refrigerator can range from about 16 hours to up to
about 3 days. I have found that one to two days works out well for me.
When the time comes to make the pizza, you should remove the dough from the refrigerator
and set it on your countertop or work surface to warm up. I usually dust the dough with a bit of
bench flour and cover it with a sheet of plastic wrap to prevent a skin from forming at the outer
surface of the dough. In most cases, it will take about an hour or two for the dough to get to the
temperature (around 60 degrees F or higher) where it can be properly shaped and stretched. In
the winter, it can take even longer. Conversely, in the summer, it can take less time. For these
reasons, I usually take the temperature of the dough to be sure that it is at the proper
temperature to safely proceed. If the temperature is too low at the time of shaping, the crust
can develop large bubbles and blisters during baking. Some actually prefer this, but professional
pizza operators detest it. Once the dough reaches the desired temperature, it can be safely used
for 3 to 4 hours thereafter in most cases without over fermenting (a dough made with highgluten
flour will have a somewhat bigger window at this point than one made with a weaker
flour). I usually turn on the oven about an hour before I think the dough will be ready to shape
and stretch into a dough round ("skin"). I put the pizza stone on the lowest oven rack position
and let it preheat at the highest oven temperature my oven can deliver (around 500-550
degrees F), for about an hour.
To shape and stretch the dough in preparation for dressing and baking, I gently flatten the
dough using my fingers while avoiding flattening the outer edge which is to become the rim or
forcing the gases out of the dough. Once the dough round is around 10 inches in diameter, I lift
it and, draping it over my closed fists, stretch it out to its final diameter (12 inches in your case)
while "flicking" the dough round by one-quarter turns. I often turn the dough over and repeat
these steps. I try to work more toward the outer edges so that thin spots don't form near the
center. A 12-inch dough round is fairly easy to handle and to toss, so you may want to try doing
this once you gain experience and feel comfortable in handling pizza dough. It isn't absolutely
necessary to do this, even though it is believed that tossing a dough helps the shaping and
stretching of the dough. For those who would like to see a video on how to shape and stretch
dough into a dough round, a good video is the one at YouTube featuring the famous dough
impressario Tony Gemignani,
Once the dough skin has reached the proper diameter, it should be placed on a peel (I prefer a wood
peel) that has been lightly dusted with a bit of flour or semolina (rice flour can also be used). Cornmeal
can also be used as a release agent, but it can burn and be messy in the oven, and require periodic
cleanings. The pizza can then be dressed. I try to act fast at this stage so that the dough doesn't decide it
wants to stick to the peel. So I always line up everything that is to go onto the pizza in advance, from
sauce, cheeses, and all the other toppings I intend to use.
Once the pizza has been dressed and the pizza stone is up to proper temperature, it can be loaded onto
the preheated pizza stone by a simple forward jerking action that allows the dressed pizza to slide off of
the peel onto the pizza stone. The first few times you do this will have you on edge, but once you master
the maneuver, you will be in good shape thereafter (although there will always be a nagging fear that
you will not successfully manage the maneuver). The pizza will typically take about 7 minutes to bake,
although the exact time will vary from oven to oven. You will therefore have to experiment with oven
temperatures and bake times, and even different positioning of your pizza stone, to get the combination
that works best for you. In due course, you may even find it helpful to use the broiler element to better
balance the baking of the top and bottom of the pizza so that they are done baking at the same time.
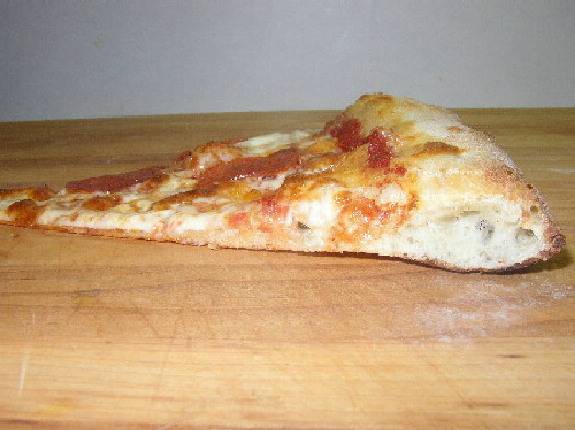
Here is an 18" version (it's thin and floppy, not thin and crispy like a cracker):
hey watts... hope u r still around ... a few months back i bought a 50lb bag of king art, sir lancelot flour ... a few weeks after buying it, i took a french bread baking class - i mentioned to the teacher i bought the 50lb bag, and his reply was..... what are u making...bagels?? ... he said this is a flour for making bagels, as the high gluton makes it chewy... he says he uses in 99pct of his baked goods regular, red bag king art flour- he says no need for the higher gluton blue bag...
i find using reg king art the pizza crust is not chewy enough, so i have been experimenting with various amounts of king art reg, and sir lancelot- last week i used a 50/50 mix -
my question is using sir lancelot, do i need to increase the water- i'm using 65pct hydration- should it be increased??
I do the Enzo Coccia recipe with less salt, 750g Caputo, 500ml water, 9g salt, 0.3g active dry yeast, hand mix the salt into the 100 deg water, then the yeast, then the flour, I mix until it feels right, let it sit for 5-10 minutes then mix it some more until it really feels correct, there is no other flour as consistent as Caputo
I recently went to a local Italian market and got some of their dough that they "use for everything" and some of their red sauce, not labeled marinara or tomato basil, no ingredients labels or nutrition facts, and it's cheaper than if I use the really good organic san marzano doing everything by hand, the dough does not perform as well as a pizza crust as what I make though, it is undoubtedly sweeter and more savory, it shrinks back up and ends up baking thicker with less diameter, has more of a sour dough smell


I recently went to a local Italian market and got some of their dough that they "use for everything" and some of their red sauce, not labeled marinara or tomato basil, no ingredients labels or nutrition facts, and it's cheaper than if I use the really good organic san marzano doing everything by hand, the dough does not perform as well as a pizza crust as what I make though, it is undoubtedly sweeter and more savory, it shrinks back up and ends up baking thicker with less diameter, has more of a sour dough smell
moose eater
Well-known member
We use whole wheat flour, but we add a LOT of gluten to it, as well as extra olive oil, and I mean -extra-. Gives it that chewy-yet-crispy-on-the-bottom NYC crust, despite using whole wheat flour.
I make our sauces most of the time, with organic tomato sauce, organic tomato paste, garlic, onion, salt, black and white peppers, bit of red wine vinegar, touch of maple syrup and molasses, oregano and sweet basil.
We typically cook our pies at about 475 to 490 f., but the medium thin stone does a much better job creating the better outcome than the thicker heavier pizza stone. Our pizza stones are cured with oil and baked hot, but we also use a bit of corn meal across the surface of the stones so there's a reduced chance of sticking.
I worked in a counter-culture-meets-sports-bar when I was in undergrad school, where I mostly worked prep cook, but there were other jobs there as well. That was nearly 40 years ago or so.
I decided to quit relying on Caputo and that Italian market, this stuff is really good and half the price of Caputo, I also made my own sauce mashed a can of San Marzanos and simmered it for an hour with fresh bay leaf, basil, and oregano while a garlic clove was roasting, then removed the herbs and mixed in the garlic


Pizza with truffels

Pizza Tonno
.jpg")
This was cooked in a pan in a Pizzaiolo oven with included pan at 650F bottom and 550F top settings, for about 4 minutes. Preheat oven and pan before making pizza in the hot pan. Put around 2 or 3 Tbsp olive oil in pan after I remove it from oven. Have the dough rolled out and all the toppings and stuff ready to drop on quick, so as not to lose a lot of heat in the pan. Put it back into the oven for around 4 to 5 minutes depending. You can make this using a range and cook the bottom with that and then into the top shelf of an oven using the highest setting and broiler for the top.
2 oz. Mozzarella, 2 oz. Jack, 2 oz. sharp cheddar all chopped up small or grate it, 1 oz. fine grated parmesan. Mix it all together. 6 1/2 oz. Rao's pizza sauce, half a bottle. 6 oz. doughball of Caputo 00 flour cold ferment 72 hours in fridge.
3 cups flour, 9 oz. or so water, 1 tsp Caputo yeast or whatever you have, 1 1/2 tsp sugar. 3/4 tsp salt. Hand mix for at least 5 minutes. I divide it into 4 sections for a 10 inch or so thin crust pizza. I freeze the dough after 3 days, and when ready to bake, I take it out and warm it in hot water bath in the sink, with the dough inside of a 6"x6"x2" Ziplock container, till I see it rise. 2 garlic cloves finely minced over the top of cheese and also a pinch of McCormicks Culinary Italian seasoning and half a pinch of Simply Organics Italian seasoning on top. Put all that on before baking
I've been making only enough dough for a single pizza and making it as soon as it rises/doubles in size, and it comes out significantly better than when left in the fridge for a few days
I have come to the conclusion that recipes on the Internet that advise doing multiple days in the fridge are full of shit, once the dough rises the yeast has expended its potential and will overferment regardless of temperature, the only thing the fridge can do is slow down the rise but there is still a limited span of time to use it
I also realized Enzo Coccia never advises multiple days in the fridge, it's all amateur food blog type recipes that do, I think at some point I came across Enzo saying the dough has to be used within 48 hours
mike-or-ozzy
Well-known member
I've been making only enough dough for a single pizza and making it as soon as it rises/doubles in size, and it comes out significantly better than when left in the fridge for a few days
I have come to the conclusion that recipes on the Internet that advise doing multiple days in the fridge are full of shit, once the dough rises the yeast has expended its potential and will overferment regardless of temperature, the only thing the fridge can do is slow down the rise but there is still a limited span of time to use it
I also realized Enzo Coccia never advises multiple days in the fridge, it's all amateur food blog type recipes that do, I think at some point I came across Enzo saying the dough has to be used within 48 hours
they prolly using gmo crap so f'em
I've actually been making pizza with the cheapest ingredients possible lol, you have to remember that when the first Italian immigrants came to NY from Naples they were poor as fuck and there weren't Italian specialty shops yet or a great importing system for things like olive oil from a particular region
There is a local mill here that makes 3 types of flour for stores in the area, a bleached all purpose that is pretty low gluten and most likely intended for pastries, whole wheat, and an unbleached all purpose that is a bit higher gluten that I think is intended as a bread flour that I have been using, $3 for 5lbs
I use walmart mozzarella, which is actually really good, obviously walmart doesn't produce the cheese and has it contracted with a company, which I think might be sargento
I've been rocking a $1.18 can of chef boyardee sauce, thickening it with a small slice of butter, and dusting with black pepper and garlic powder once its spread on the pizza
The one thing I don't cheap out on is the yeast and have been using platinum instant

