PassionForMaryJ
Active member
List of Stuff.
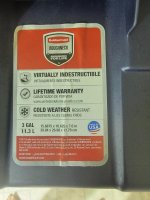
1 x 3 Gallon/11.3 L Rubbermaid Roughneck tote - Already had it, but new like 5.00
1 x Tetra Whisper Air Pump - 100 gallon, Blue - 20.00
1 x FREESEA 25/50/100/200/300 Watt Aquarium Heater with Aquarium Submersible Thermometer - 15.00
1 x Two Pack of Pawfly 2.4 Inch Air Stone Bubble Mineral Ball Shaped Airstones Diffuser for Aquarium Fish Tank Pump - 10.00
1 x Henkel Corporation 908570 2.7 oz Tub Clear Silicone Waterproof Sealant, Single Tube - 6.50
1 x 50 Pack Cloning Collar Inserts, Premium Rubber, Weather and Water Resistant, fits 2 inch net pots, Made in USA - 14.00
1 x 25' of Deep Jungle 3/16" I.D. 1/4" O.D. Silicone Black Flexible Airline Tubing for Aquariums, Terrariums, and Hydroponics - 9.00
6 x 2" net pots, already had some, but they are sold in sets for like 5.00 to 10.00
Optional Just in case. 1 x BAC Industries ST-02 Mr.Stickies Underwater Glue - 13.00
-------------
Total 79.00 wo optional special glue - with optional special glue 92.00
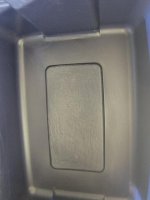
It is kind of hard to do a step by step, as I already roughed up the bottom of it, to allow the silicone to better bond the heater to the bottom of the cloner..
First I got the tote, cleaned it and dried it, then used something sharp and scratched the bottom, rough sandpaper would work better..
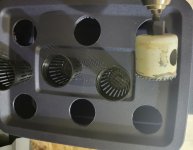
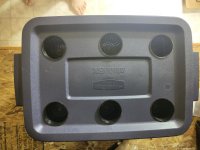
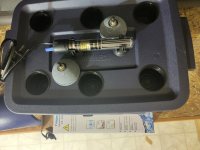
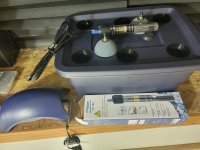
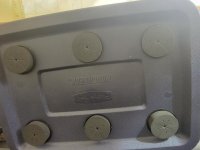
Drilled my holes, 6 of them, just eyeballed the placement..
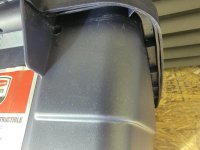
Drilled my air hose hole near a handle, may drill a hole in the other side and run 2 air hoses, or split it to two lines right after it enters the cloner.
Use the suction cups and holders with the heater, silicone them down and attach heater.
Run air hose in, attach it, you may want to consider check valves just in case, probably not needed.
Run your wire into the cloner from the thermostat that comes with the heater.
Rinse it out good, fill with water, I prefer distilled, or RO myself...
Turn heater on and get the water to stay steady between 68F - 72F , the cooler you have it the less chance of bacteria forming, but keep the air stones going and it will be fine, I like my res at about 70F
Put your clones in the neoprene inserts, insert into the cloner, be sure your clone stems are long enough, and your res is as high as it can be, if you drill the hole in the lid for the air hose you will be able to get it as full as possible without leaking...
Stems are fine submerged, as long as you keep the airstones bubbling the water always.
When I get mine ready to run I will add more pics...
1 x 3 Gallon/11.3 L Rubbermaid Roughneck tote - Already had it, but new like 5.00
1 x Tetra Whisper Air Pump - 100 gallon, Blue - 20.00
1 x FREESEA 25/50/100/200/300 Watt Aquarium Heater with Aquarium Submersible Thermometer - 15.00
1 x Two Pack of Pawfly 2.4 Inch Air Stone Bubble Mineral Ball Shaped Airstones Diffuser for Aquarium Fish Tank Pump - 10.00
1 x Henkel Corporation 908570 2.7 oz Tub Clear Silicone Waterproof Sealant, Single Tube - 6.50
1 x 50 Pack Cloning Collar Inserts, Premium Rubber, Weather and Water Resistant, fits 2 inch net pots, Made in USA - 14.00
1 x 25' of Deep Jungle 3/16" I.D. 1/4" O.D. Silicone Black Flexible Airline Tubing for Aquariums, Terrariums, and Hydroponics - 9.00
6 x 2" net pots, already had some, but they are sold in sets for like 5.00 to 10.00
Optional Just in case. 1 x BAC Industries ST-02 Mr.Stickies Underwater Glue - 13.00
-------------
Total 79.00 wo optional special glue - with optional special glue 92.00
It is kind of hard to do a step by step, as I already roughed up the bottom of it, to allow the silicone to better bond the heater to the bottom of the cloner..
First I got the tote, cleaned it and dried it, then used something sharp and scratched the bottom, rough sandpaper would work better..
Drilled my holes, 6 of them, just eyeballed the placement..
Drilled my air hose hole near a handle, may drill a hole in the other side and run 2 air hoses, or split it to two lines right after it enters the cloner.
Use the suction cups and holders with the heater, silicone them down and attach heater.
Run air hose in, attach it, you may want to consider check valves just in case, probably not needed.
Run your wire into the cloner from the thermostat that comes with the heater.
Rinse it out good, fill with water, I prefer distilled, or RO myself...
Turn heater on and get the water to stay steady between 68F - 72F , the cooler you have it the less chance of bacteria forming, but keep the air stones going and it will be fine, I like my res at about 70F
Put your clones in the neoprene inserts, insert into the cloner, be sure your clone stems are long enough, and your res is as high as it can be, if you drill the hole in the lid for the air hose you will be able to get it as full as possible without leaking...
Stems are fine submerged, as long as you keep the airstones bubbling the water always.
When I get mine ready to run I will add more pics...