
So, I've been holding this thread for a week now hoping my photo upload problem would get ironed out, but it hasn't. Maybe someone here can help. I can't get any new photos uploaded to my directory. I get the screen to select files, then it goes straight to the message "No more images found." Anyway, here's what I have (short of the really fun pics)...
_____________________________________
Well, this year’s tumbler runs are turning out quite good and I felt it was time to build myself a proper hash press. Last year’s wood splitter hash went reasonably well, but I don’t have access to that splitter this year, so, after searching the ‘net for while, I sent out the call to fellow IC’ers and Fonda Trichs stepped up with just the info I needed. Thanks! On with the build...
First off, I went out and purchased the bottle jack I needed. Fonda Trichs had mentioned that a 2-ton jack didn’t work, so I went with the 6-ton. $22.99 +tax at Orchard Supply Hardware got me a nice Craftsman model with a 1-year warranty. I purchased the jack first so I could measure it’s footprint and ensure the frame I made would accommodate it.
Next in the parts list were the two pieces of channel steel. Fonda Trich’s material list mentioned the top and bottom were different widths, but I really didn’t see a good reason why, so I went with two 4 inch wide pieces cut 12 inches long. Both pieces with tax came to $8.11 at my local steel supply house. I should have also had them drill the holes there, but more on that later.
Next up I headed to the Home Despot (Christmas gift cards are great, huh?) and picked up a 36” long ¾ inch thick threaded rod. My intention is to cut it in half and have a little extra at the top to accommodate larger molds and/or metal plates. That piece and eight ¾” washer/ nut combos cost me $15.83. I also bought a ¾” drill bit to the tune of $19.94. I thought that since I have an upright drill press I could simply drill the holes at home and avoid any suspicion at the steel shop. What a mistake. Easily the hardest part of this whole frame build was drilling these holes! After calling a really nice machine shop owner, I got a couple tips that made the job much smoother *. He also told me it would have cost me about $10 to have him drill them – half the cost of the bit I had to buy! With all materials in hand, I began work.
I went ahead and marked where I wanted the rods to come through the channel steel...

...and drilled my pilot holes.

I then set up the ¾” bit on the press and drilled out the bigger holes.

Once I got the ¾” holes drilled, I ran the edges of the channel steel over the grinder so they would have a bevel that wouldn’t scratch or cut.

After using a wire brush wheel to scrape off any rust, I have all the pieces ready for assembly. I plan to paint this frame after I dry fit everything, so removing the rust is critical. I thought I had metal primer paint up here at the house, but I didn’t, so the final cosmetics will have to wait till I go to town again. However, the paint isn’t going to affect the performance so assembly was next.

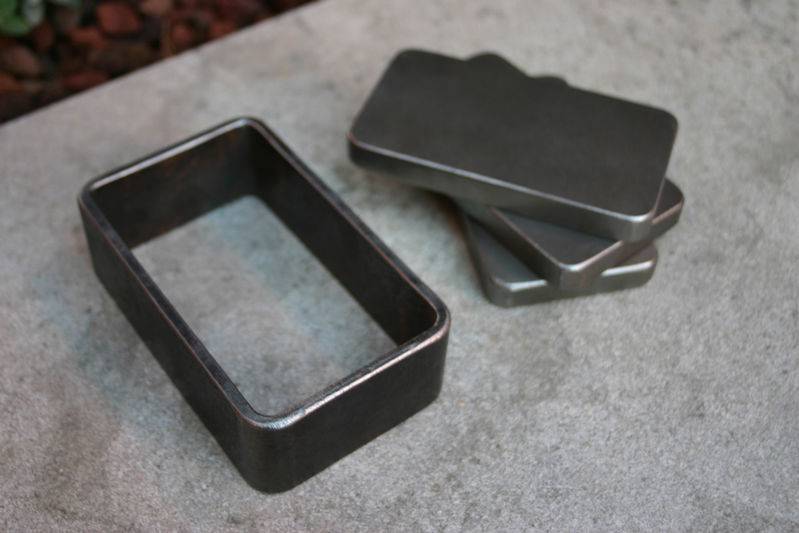
Not shown in the above picture are the two metal plates I plan on pressing between. When I was talking to a friend about cellophanes and plastics I could use to line the mold, he reacted strongly to the idea of heat and plastic coming into contact with a smokable product. Since this is all going to med patients, I took this reaction to heart and plan on using cloth bags again this year. (NOTE - I've since headed back to the metal shop and purchased the materials for a mold. Total cost for metal was less than $15. If I can get photos uploaded, I'll put up how I made these suitable for pressing.)
Here is an empty bag waiting to be filled...

...and with ~30 grams packed into it and tied off with strong, nylon thread.

I preheated these plates in the oven at 175° F before pressing.

And the final product...

Total cost for the press came in at just under $67. Had I had someone else drill the holes, I could have actually saved a few bucks more. Improvements to this design will be bolting it down and some sort of spring mechanism to lift the jack similar to this press:

(Photo courtesy of The Great Books of Hashish, Vol. 1: Book 1 by Cherniak)
___________________________________________________
Thanks to all who helped with ideas/ materials and look for my next project – a new hash tumbler with instructions and sources for all the parts. It would be easy enough for a third grader to build his or her own tumbler for under $100.
Until then – happy tumbling and pressing to all!
- Butte
___________________________________________________
* SIDEBAR: How to drill big holes in thick steel
First off, make sure you’ve set up your press to run as slow as possible 2-300 rpm with a ¾” bit is plenty. Next up, drill a pilot hole approx. 1/3 the diameter of your finished hole. After spraying a little oil/ lubricant, slowly drop your big bit into your pilot hole and allow it to nibble away at the hole. Small chips coming out of the hole are a good sign. You should be able to drill all the way through fairly quickly once these things are done. I had to re-tip the bit several times before going slow with oil, so you may want to have a bench grinder handy as well.
_____________________________________
Well, this year’s tumbler runs are turning out quite good and I felt it was time to build myself a proper hash press. Last year’s wood splitter hash went reasonably well, but I don’t have access to that splitter this year, so, after searching the ‘net for while, I sent out the call to fellow IC’ers and Fonda Trichs stepped up with just the info I needed. Thanks! On with the build...
First off, I went out and purchased the bottle jack I needed. Fonda Trichs had mentioned that a 2-ton jack didn’t work, so I went with the 6-ton. $22.99 +tax at Orchard Supply Hardware got me a nice Craftsman model with a 1-year warranty. I purchased the jack first so I could measure it’s footprint and ensure the frame I made would accommodate it.
Next in the parts list were the two pieces of channel steel. Fonda Trich’s material list mentioned the top and bottom were different widths, but I really didn’t see a good reason why, so I went with two 4 inch wide pieces cut 12 inches long. Both pieces with tax came to $8.11 at my local steel supply house. I should have also had them drill the holes there, but more on that later.
Next up I headed to the Home Despot (Christmas gift cards are great, huh?) and picked up a 36” long ¾ inch thick threaded rod. My intention is to cut it in half and have a little extra at the top to accommodate larger molds and/or metal plates. That piece and eight ¾” washer/ nut combos cost me $15.83. I also bought a ¾” drill bit to the tune of $19.94. I thought that since I have an upright drill press I could simply drill the holes at home and avoid any suspicion at the steel shop. What a mistake. Easily the hardest part of this whole frame build was drilling these holes! After calling a really nice machine shop owner, I got a couple tips that made the job much smoother *. He also told me it would have cost me about $10 to have him drill them – half the cost of the bit I had to buy! With all materials in hand, I began work.
I went ahead and marked where I wanted the rods to come through the channel steel...

...and drilled my pilot holes.

I then set up the ¾” bit on the press and drilled out the bigger holes.

Once I got the ¾” holes drilled, I ran the edges of the channel steel over the grinder so they would have a bevel that wouldn’t scratch or cut.

After using a wire brush wheel to scrape off any rust, I have all the pieces ready for assembly. I plan to paint this frame after I dry fit everything, so removing the rust is critical. I thought I had metal primer paint up here at the house, but I didn’t, so the final cosmetics will have to wait till I go to town again. However, the paint isn’t going to affect the performance so assembly was next.

Not shown in the above picture are the two metal plates I plan on pressing between. When I was talking to a friend about cellophanes and plastics I could use to line the mold, he reacted strongly to the idea of heat and plastic coming into contact with a smokable product. Since this is all going to med patients, I took this reaction to heart and plan on using cloth bags again this year. (NOTE - I've since headed back to the metal shop and purchased the materials for a mold. Total cost for metal was less than $15. If I can get photos uploaded, I'll put up how I made these suitable for pressing.)
Here is an empty bag waiting to be filled...

...and with ~30 grams packed into it and tied off with strong, nylon thread.

I preheated these plates in the oven at 175° F before pressing.

And the final product...

Total cost for the press came in at just under $67. Had I had someone else drill the holes, I could have actually saved a few bucks more. Improvements to this design will be bolting it down and some sort of spring mechanism to lift the jack similar to this press:

(Photo courtesy of The Great Books of Hashish, Vol. 1: Book 1 by Cherniak)
___________________________________________________
Thanks to all who helped with ideas/ materials and look for my next project – a new hash tumbler with instructions and sources for all the parts. It would be easy enough for a third grader to build his or her own tumbler for under $100.
Until then – happy tumbling and pressing to all!
- Butte
___________________________________________________
* SIDEBAR: How to drill big holes in thick steel
First off, make sure you’ve set up your press to run as slow as possible 2-300 rpm with a ¾” bit is plenty. Next up, drill a pilot hole approx. 1/3 the diameter of your finished hole. After spraying a little oil/ lubricant, slowly drop your big bit into your pilot hole and allow it to nibble away at the hole. Small chips coming out of the hole are a good sign. You should be able to drill all the way through fairly quickly once these things are done. I had to re-tip the bit several times before going slow with oil, so you may want to have a bench grinder handy as well.
Last edited:


")


