What's new
  • Happy Birthday ICMag! Been 20 years since Gypsy Nirvana created the forum! We are celebrating with a 4/20 Giveaway and by launching a new Patreon tier called "420club". You can read more here.
  • Important notice: ICMag's T.O.U. has been updated. Please review it here. For your convenience, it is also available in the main forum menu, under 'Quick Links"!

DIY venting through a roof

G

Guest

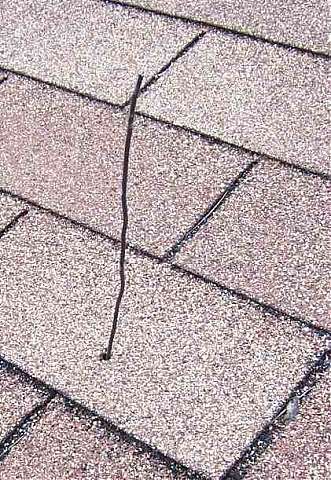
Maybe this thread will help make some of you brave enough to cut a big old hole right into your roof. Venting air up high helps to keep the smell and noise away from those nosey folks that stop by.

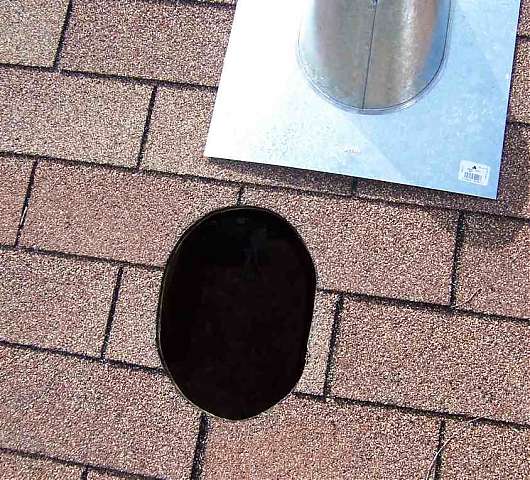
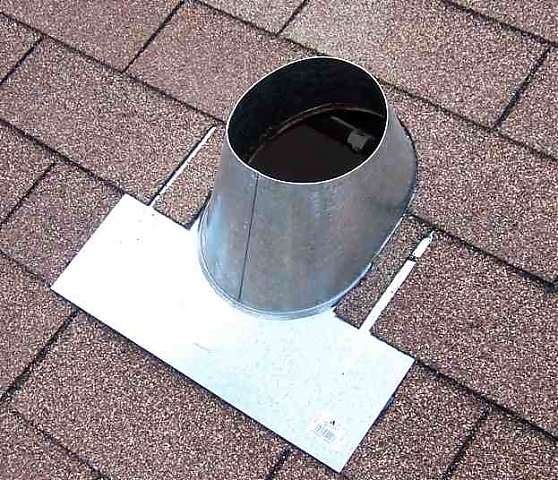
This is in a shed,and will be used while I dry my plants,it uses a piece of Class B chimney flue pipe, so later on if I want to hook up a gas heater Ill be set to go. Class B is for gas appliances and is double wall, one section around 5 feet long is about 35 dollars, alot more than regular duct, but its required if I do hook a heater to it.

You need stronger pipe if you want to use a wood burner, if your positive it will only be used to vent the grow room, regular duct will work.

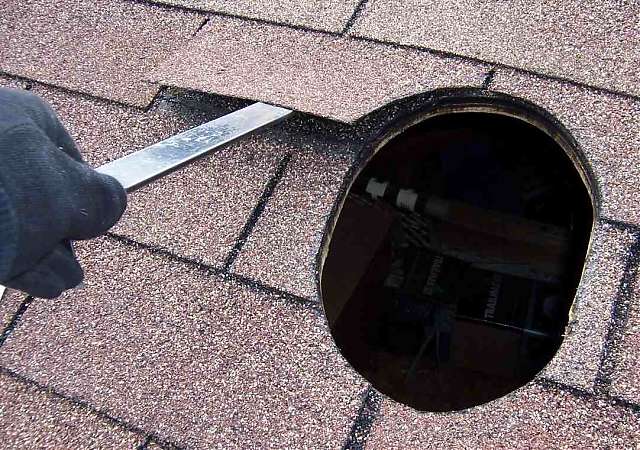
If possible if your doing this in a garage or shed, I would put the pipe at the far end of the building, when people look at it, that would be the "normal" spot for a chimney, who would have a heater right in the middle of a 2 car garage?

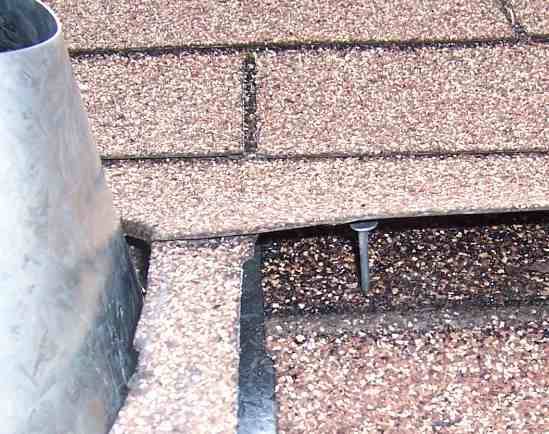
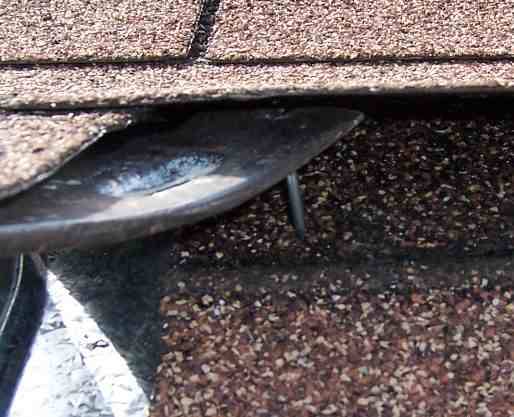
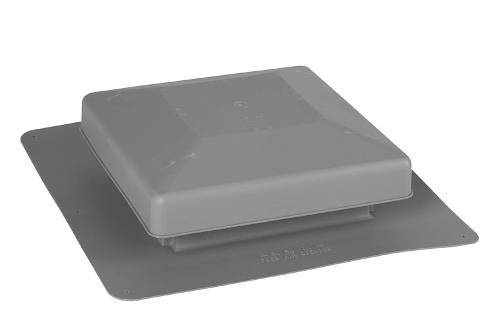
NOTE..you can use a flush mount attic vent,its the same process,but without the flue pipehere is a flush mount vent ,there are many kinds ,some have flappers to stop a back draft..MAKE SURE THE ONE YOU BUY AS A CONNECTION POINT FOR ADDING DUCT WORK

 
Last edited:
G

Guest

(PIC1 and 2)
First look outside and find the general area you want the pipe, then go inside and find your rafters, I drilled a hole dead center between my rafters, then pushed a wire up through the hole , this makes it easy to find your spot.

(PIC3)
Position the rain cap up or down so you dont have tiny pieces of shingles lift over when your done, youll see in pic 9 what i mean.


Either use a maker or just scrib around the inside the collar to mark you cutting area


Last edited:
G

Guest

(PIC1)
Its easier to start your cut if you drill a few holes for your saw blade to drop down into, i fine tooth blade cuts slower, but it will vibrate alot less than a rough cut wood blade, use a jig saw , or saws-all to make the hole.

(PIC2)
This is one of the tougher parts, using something thin, like a putty knife,break the seal on the shingles, you have to be able to slip the top half of the rain cap up under the shingles.


The nails or staples that are in the way,will have to be pried out, take your time so you dont tear a shingle, youll only have about 4 to 8 nails to remove.You need a flat pry bar to get this part done, sometime a piece of metal can be used to catch the nail head and you can hammer it out sideways.
(PIC3)
When you can slip the rain cap up under the shingles,its time to replace the nails under the shingles.


Last edited:
G

Guest

(PIC 1 and 2)
It may be easier to to slip a nail into place,and sit the flat bar on top of the nail, then hit the flat bar with a hammer to drive in the nails. Ill have a closer pic later to explain.


When you have the nails replaced you will have to cement the shingles back down, roofing tar ,some brands are called roof jack, can be bought for a chaulk gun, seal the nail heads and the edge of the shingle , stepping on the shingles will get them down flat again.


Last edited:
G

Guest

Slip the pipe up through the collar ,its usually alot easier to do from the bottom side,you may have to have someone hold the pipe,or have something to set under it.Double wall pipe has a arrow pointing up, on its side,this prevent gases from leaking out of the pipe.

When used for a heater you have to maintain a certain height above the roof .

ROOF PITCH - rise/run in inches

MINIMUM HEIGHT*

Flat to 7/12 - 1.0 foot above the roof surface

7/12 to 8/12 - 1.5 feet above the roof surface

8/12 to 9/12 - 2.0 feet above the roof surface

9/12 to 10/12 - 2.5 feet above the roof surface

10/12 to 11/12 - 3.25 feet above the roof surface


Chaulk around the cap, and then slip on a storm collar, chaulk around the pipe , where the collar will set,and slide the collar down into the chaulk, now chaulk the top side of the storm collar, the chaulk in the photo is white, but turns clear when it dries, buy a chualk with the highest rated temp rating you can find,or use flue sealer.

The top is covered with a vented cap to keep out rain and animals , I didnt show mine,no need to give people more to look for...( OG taught me that) only put screws in a double wall pipe at the very top,to hold the cap on.


Double wall classB pipe needs to be 1 inch from flamable material, they make straps to hold the flue, i made my own, i have a 1 inch piece of metal between the wood and flue, thats not shown in the photo.

Use a bubble level on your flue pipe so it straight up and down,befor installing your flue strap..


Last edited:
G

Guest

Heres the photo showing how I nail down a shingle without having to lift it up very high,old shingles will break, very old ones will just fall apart, to replace a broken shingle ,you just have to remove all of its nails and slide in a new shingle.

If your roof is very old, you may not want to try this, you will keep breaking more and more shingles as you try to replace them. If your shingles are that old,its about time for a new roof anyway.

 
G

Guest

Now you can add on the pipe of your choice, for use with a heater,you need more double wall pipe, if its just for grow room air,use the cheaper duct pipe to finish the connections.

Mine will be hooked to a carbon filter, its another DIY...
 

NorCal

Member
Veteran
ive always wondered about work like this but never seen it done, great article and the pix are nice, I never cared to attempt anything because of the risk of when it rains if the holes arent sealed properly it could be disastrous, thanx for the tutorial....
 
Norcal said it right....I've always wanted to do this, but was intimidated with the job of " not knowing what the hell I'm doing"

Great Job!

RUSH
 
G

Guest

Bud with clay or concrete tile it is the same method. The only difference is that you need to cut the tiles and use a different roof jack with a lead base instead of galvanized.

Just remember if you plan on hooking the flue pipe up to a heater or fireplace you need a 1 inch clearance all the way around it from any combustable materials.

Nice thread Mole.
GCG
 
The best thing about direct venting to outside is you can use almost all The ozone you want to make double sure the smell is killed. This IMO is where a tiger strip is best used. We did the carbon then ozone.
Great write up.
 
G

Guest

Thanks everyone..you probly have a vent on your roof you can look at to see it in person, BUT it should look like my install,ive seen some poorly installed ones.

the rain will run down your roof as usual,and then over the exposed metal,some people dont nail the metal at all,letting the flue hold the flashing in place,but hard winds can blow rain uphill.

garlic city gro
I stated that you need 1' of clearance from combustibles ...but read you pipes install directions,some may vary, I would use actual flue pipe through the roof area even if your just venting a grow room, flue pipe looks "right" and at some point you may install a heater,and youll be set to go.

Budweiser13
I think they make a replacement tile thats precut also,and if you have a flat concrete roof, you use a differant seal around the flue, and then its usually sealed down with a small piece of rubber roofing.

when working with shingles ,just take your time removing the old nails , and getting the shingles loose, old ones are stiff and brittle.

EDIT...HERE IS ONE WAY TO VENT CLAY TILE
just a quick internet look came up with this one...its all the looking am doing :smile:
 
Last edited:

conehead

Active member
Hi dudes & dudets, isn't venting outside dangerous due to the choppers & their Infrared Red heat seeking cameras?. Or does it carry more respectability comming out of a profesional looking flute, roof vent. I'm Perplexed as usual. <<Stealthy is healthy>>
Nothing a few cones of mind blowing bud wont fix.
 

Dovepistil

New member
DWV! A plumber would say drain-waste-vent. Almost every basin, sink, toilet has a black (ABS) DWV pipe going thru the roof to vent air in and out of the sewer system. Typically, a house roof is covered with 'em. The typical toilet size is 3" pipe. They are open to the sky because any rain that falls in goes down the sewer. I didn't make any holes in my roof, I just teed into an existing toilet vent and attached a 4" to 3" reducer to blow exhaust from my 4" fan right up the pipe. My 4" side pipe was sloped a bit uphill to keep any rain water from getting into the fan. This blows air thru your entire sewer system and causes it to come out every vent. The sewer gas never entered the garden since fan ran 24/7. If you system happens to be a smelly one, this can cause "sewer gas" to be blown out of sewer system straight up into the air. (Fan noise was also sent up into the air.) In modest quantities, the "waste" smell helps mask any bud smell that you're adding to the mix. Every plumbing fixture has a water trap which absolutely prevents any sewer gas (and MJ smell) from entering the house. On a practical note, a percentage of toilets are not sealed well to the sewer. After I pressurized my pipes with flower smell, I found that I needed to replace the wax ring on the toilet flange that makes the sewer seal ($2). This setup worked well for many years, and when I sold the house, I just put a cap on my 4" line. And yes, conehead, hot air out of pipe shows up on heli FLIR, but DWV pipes often have heat coming out of them from hot showers, dishwashers, etc. and is normal appearance. Since the pipes point straight up into the air, the smells dispersed high into the air due to blast out of my axial fan. 'Sure does save on roof work and possibility of roof leaks!
 
Last edited:
One issue is these vents if used for any type of heating need to be taller than the peak of the roof-line. if its just a vent no problem, if you add any kind of burner code requires it to be taller than the roof. Good luck.
 

Latest posts

Latest posts

Top