Slezman
Member
Whatup ICMAG!!!!
This is truly a day among days. . . My first grow is up and running!!! I can't wait to see the results. It took A LOT OF WORK to set everything up. More importantly it cost a lot of money. I guess I could've done this grow for a little cheaper but, then again, I am a newb and mistakes are part of the learning process. Ok so here goes, let me tell you where my girls are living. . .
Cabinet:
Dimensions (WxLxH): 48" x 32 x 64"
Volume: 57 ft^3
The cabinet itself is raised off the floor so I could get the returns from my bucket higher than the res (work with gravity not against it). In the back of my mind I also thought that this might improve airflow beneath the cab and keep it a little cooler.
I built the cabinet using Tick's instructions (http://www.icmag.com/ic/showthread.php?t=27982). Obviously the dimensions are different than what he constructed. I had to make the box much higher because my buckets are so tall (around 18"). If I could do this over, I probably would've just constructed a room in my basement using some 2X4s and black and white plastic. . . The building of the cabinet itself wasn't that hard but fitting all the components in was a real pain (especially since I put the mylar up way to early!!!)
Everything up and running:
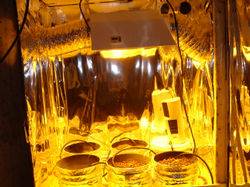
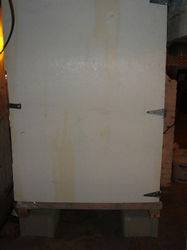
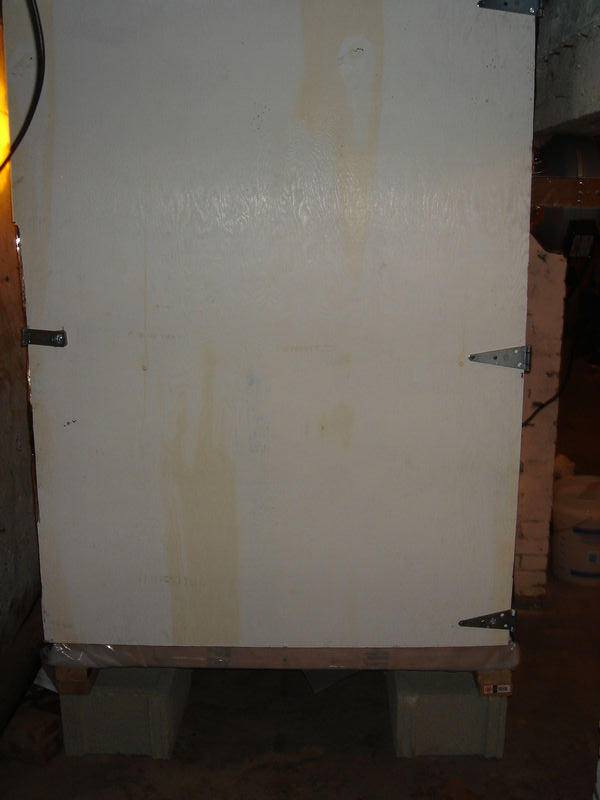
With the door closed . . .:
Hydro System:
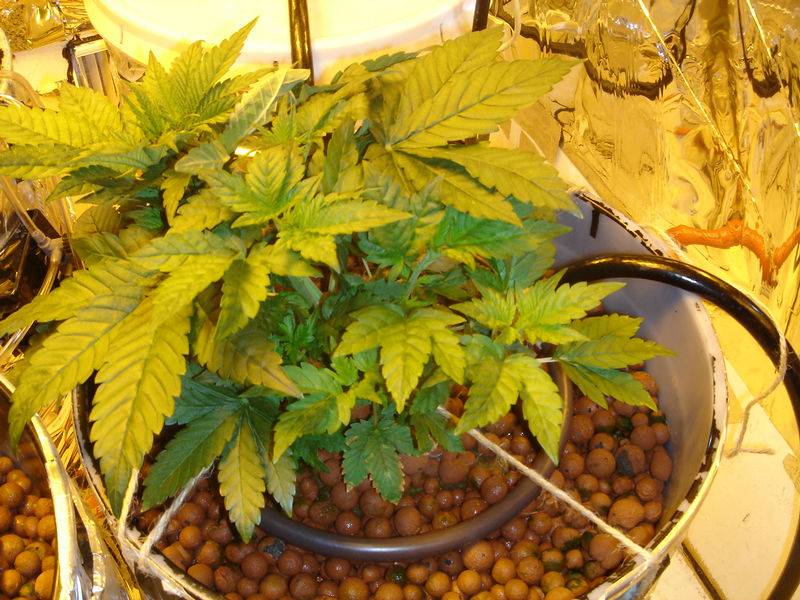
I decided to go with a top feed nested bucket drip system. I have six buckets. Just for everyone who doesn't know what this is, I'll summarize it real quickly. Basically a 5 gallon bucket is outfitted with a drain hole, nozzle, and drain line about 2" up from the bottom. Holes are drilled into the bottom of a seperate 3 gallon bucket. When the system is set up, the 3 gallon bucket contains clay pebbles (hydroton), a rockwool block, and obviously your strain of choice. A drip emitter is run constantly into the 3 gallon bucket. The water drains down through all the pebbles and through the holes in the bottom bucket. Since the drain for the 5 gallon is 2" from the bottom, there will be a mini reservoir in each bucket. In the "mini res" there is an airstone connected to an air pump which aerates the water, providing oxygen to the roots once they grow through the holes in the 3 gallon bucket. Search "root porn" here on ICMAG and you will get an idea of what I'm talking about.
I used 1/2" utility hose for my main supply and drain lines from each bucket. Coming off of the main supply line are 1/4" tubing drip lines for each bucket. The 1/4" hose was connected to the main supply line by 1/4" "T" barbs. So 2 dripper lines come off from each "T" barb making a total of 3 T-barbs in the main supply line. The dripper lines are conncted to drip rings because the flow seemed a little strong for any one drip line. I put these drip rings around the plants right on the surface of the clay pebbles.
I'm using a 350 gph mag drive pump that I bought at a pet store. My Optima air pump was bought at the same store although I'm having second thoughts about it. . . more on this below.
Basic Layout of hoses and what not:

Nozzle and connector for the buckets:

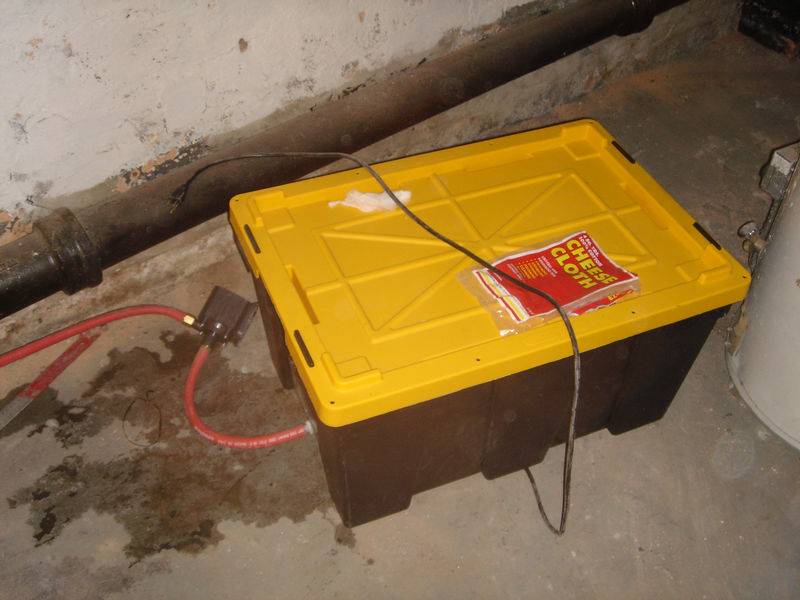
Reservoir and Pump (on the left):

Ventillation:
I have a 265 dayton squirrel cage fan venting the top of the cabinet into the basement. This fan will be attached to a homeade scrubber I built by following DurbanPoison's instructions (http://www.icmag.com/ic/showthread.php?p=509470#post509470). I'm leaving it off right now cause my plants don't smell yet and I need the larger ventillation capacity since it's quite hot outside. There are two 5" X 13" passive vents on the bottom of the cabinet that allow in fresh air. All my wires for my light and airhose also pass through a hole I made next to the side of one of the vents.
My Light is air cooled by an 8" vortex inline fan. 8" flexible ducting (bought from Grainger) connects the fan to the light and the light to the outside of my cab. So the order of components in the direction of air flow is like this: mini piece of 8" ducting>8" vortex fan> 8" ducting through wall of cabinet>hood>8" ducting through other wall of cabinet. All the holes in the cabinet for the ducting were sealed with silicone and foil backed tape. As you can see, the light is just vented using the air the room the cabinet is in, there is no outside air.
Temperatures are around 3-5 F above ambient temperature. I'm gonna be honest, I had a really tough time hooking my ventillation up. My trouble was mainly due to the fact that I was using cheap inline fans bought from home depot (they call them "duct booster fans"). They hardly had any effect on the temperature of my cabinet. Before I got the vortex and the squirrel cage, temperatures were easily 10-15 degrees above ambient. The duct booster fans are really not suitable for our purposes. They are cheap and can just not push enough air despite their CFM ratings. . . Don't waste your money like me!! Buy a vortex and/or squirrel cage blower. Most fans are under $200.00 (I bought mine from www.MDhydro.com for $188.00) which is not that much money. The two fans were the most expensive components of my system besides my light but I figure that they will last a while and I can use them with other setups if need be. Plus, my plants will be nice and cool. No worries, no problems.
The Vortex air cooling the light:

The Squirrel Cage Fan on the back of the cab for the exhaust:

Lighting:
Ahh, the most important part of any grow. I'm using a lumatech 600 W digital ballast with a hortilux HPS bulb. I can't wait to see how my girls do under this light. My hood is a Hydrofarm 8" radian AC. I had originally bought a regular Hydrofarm Radian but during my ventillation difficulties I decided to return it (always a good reason to buy expensive things locally) because I didn't think enough air was getting in through those 8" flanges. If anyone is looking at the Radian, I would suggest going with the AC version even if you are not air cooling it (you might want too eventually). It's not that much more expensive than the radian and the reflective surface lost to the 8" diameter connections for air is negligible.
Nutrients:
Since I am a newb I am going with the 1 part FloraNova grow for veg and FloraNova bloom for flowering. It seems like a lot of hydro growers are putting five or six different nuturient/additives in their solutions. That seemed to complex and anxiety producing for me. I just wanted something simple that would work. I'm sure I will change to different nurtients and complicate things for the next grow when I have learned more about what to use.
I think I'm also going to add some H202 into the res to kill bacteria (?).
Strains:
Super Silver Haze and Stonehedge (freebie!) bought from Seedboutique.
CO2:
While I was trying to sort out my ventillation issues I thought I could try using CO2 since my temps were so high (85+ F). It turns out I corrected this problem by buying the Vortex. But for a while I was considering buying a CAP CO2 regulator/solenoid valve since it was around the same price as the vortex. I already had a tank that I got from a friend so I decided to fill it anyway (only $17.00). Right now it's sitting outside the cab next to my passive vents so when I turn the valve, the gas goes right inside. I am just going to turn it on for 2-3 minutes after I'm done working on my plants. Obviously I will turn the exhaust fan off when this is being done. I know it's not very scientific or precise but I have a tank and I'm going to get my $ worth! I figured it can't really do any harm.
Pruning/Training method:
I don't have that much room for my plants to grow so I have to SCROG.
Well that's about it as far as the setup goes. I'd like to take a quick moment to thank MTF Sandman and MrGreenJeans and everyone else who helped me set everything up. Sorry for the wordy post everyone. Hopefully someone will find it useful. I welcome all criticiscms/advice/questions and even stupid comments.
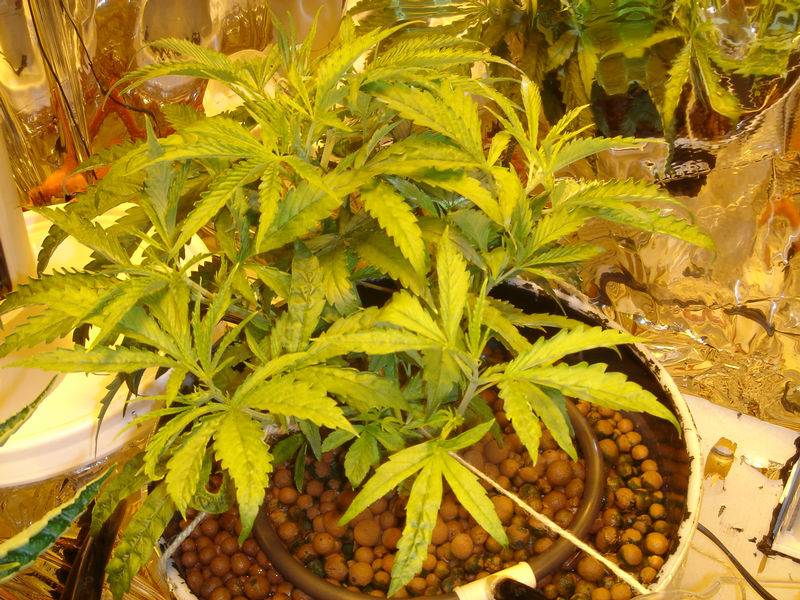
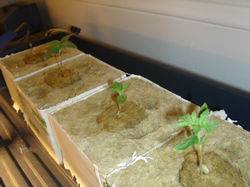
Here's a picture of my 3 girls before they went into the cab.
This is truly a day among days. . . My first grow is up and running!!! I can't wait to see the results. It took A LOT OF WORK to set everything up. More importantly it cost a lot of money. I guess I could've done this grow for a little cheaper but, then again, I am a newb and mistakes are part of the learning process. Ok so here goes, let me tell you where my girls are living. . .
Cabinet:
Dimensions (WxLxH): 48" x 32 x 64"
Volume: 57 ft^3
The cabinet itself is raised off the floor so I could get the returns from my bucket higher than the res (work with gravity not against it). In the back of my mind I also thought that this might improve airflow beneath the cab and keep it a little cooler.
I built the cabinet using Tick's instructions (http://www.icmag.com/ic/showthread.php?t=27982). Obviously the dimensions are different than what he constructed. I had to make the box much higher because my buckets are so tall (around 18"). If I could do this over, I probably would've just constructed a room in my basement using some 2X4s and black and white plastic. . . The building of the cabinet itself wasn't that hard but fitting all the components in was a real pain (especially since I put the mylar up way to early!!!)
Everything up and running:

With the door closed . . .:
Hydro System:
I decided to go with a top feed nested bucket drip system. I have six buckets. Just for everyone who doesn't know what this is, I'll summarize it real quickly. Basically a 5 gallon bucket is outfitted with a drain hole, nozzle, and drain line about 2" up from the bottom. Holes are drilled into the bottom of a seperate 3 gallon bucket. When the system is set up, the 3 gallon bucket contains clay pebbles (hydroton), a rockwool block, and obviously your strain of choice. A drip emitter is run constantly into the 3 gallon bucket. The water drains down through all the pebbles and through the holes in the bottom bucket. Since the drain for the 5 gallon is 2" from the bottom, there will be a mini reservoir in each bucket. In the "mini res" there is an airstone connected to an air pump which aerates the water, providing oxygen to the roots once they grow through the holes in the 3 gallon bucket. Search "root porn" here on ICMAG and you will get an idea of what I'm talking about.
I used 1/2" utility hose for my main supply and drain lines from each bucket. Coming off of the main supply line are 1/4" tubing drip lines for each bucket. The 1/4" hose was connected to the main supply line by 1/4" "T" barbs. So 2 dripper lines come off from each "T" barb making a total of 3 T-barbs in the main supply line. The dripper lines are conncted to drip rings because the flow seemed a little strong for any one drip line. I put these drip rings around the plants right on the surface of the clay pebbles.
I'm using a 350 gph mag drive pump that I bought at a pet store. My Optima air pump was bought at the same store although I'm having second thoughts about it. . . more on this below.
Basic Layout of hoses and what not:

Nozzle and connector for the buckets:

Reservoir and Pump (on the left):
Ventillation:
I have a 265 dayton squirrel cage fan venting the top of the cabinet into the basement. This fan will be attached to a homeade scrubber I built by following DurbanPoison's instructions (http://www.icmag.com/ic/showthread.php?p=509470#post509470). I'm leaving it off right now cause my plants don't smell yet and I need the larger ventillation capacity since it's quite hot outside. There are two 5" X 13" passive vents on the bottom of the cabinet that allow in fresh air. All my wires for my light and airhose also pass through a hole I made next to the side of one of the vents.
My Light is air cooled by an 8" vortex inline fan. 8" flexible ducting (bought from Grainger) connects the fan to the light and the light to the outside of my cab. So the order of components in the direction of air flow is like this: mini piece of 8" ducting>8" vortex fan> 8" ducting through wall of cabinet>hood>8" ducting through other wall of cabinet. All the holes in the cabinet for the ducting were sealed with silicone and foil backed tape. As you can see, the light is just vented using the air the room the cabinet is in, there is no outside air.
Temperatures are around 3-5 F above ambient temperature. I'm gonna be honest, I had a really tough time hooking my ventillation up. My trouble was mainly due to the fact that I was using cheap inline fans bought from home depot (they call them "duct booster fans"). They hardly had any effect on the temperature of my cabinet. Before I got the vortex and the squirrel cage, temperatures were easily 10-15 degrees above ambient. The duct booster fans are really not suitable for our purposes. They are cheap and can just not push enough air despite their CFM ratings. . . Don't waste your money like me!! Buy a vortex and/or squirrel cage blower. Most fans are under $200.00 (I bought mine from www.MDhydro.com for $188.00) which is not that much money. The two fans were the most expensive components of my system besides my light but I figure that they will last a while and I can use them with other setups if need be. Plus, my plants will be nice and cool. No worries, no problems.
The Vortex air cooling the light:

The Squirrel Cage Fan on the back of the cab for the exhaust:

Lighting:
Ahh, the most important part of any grow. I'm using a lumatech 600 W digital ballast with a hortilux HPS bulb. I can't wait to see how my girls do under this light. My hood is a Hydrofarm 8" radian AC. I had originally bought a regular Hydrofarm Radian but during my ventillation difficulties I decided to return it (always a good reason to buy expensive things locally) because I didn't think enough air was getting in through those 8" flanges. If anyone is looking at the Radian, I would suggest going with the AC version even if you are not air cooling it (you might want too eventually). It's not that much more expensive than the radian and the reflective surface lost to the 8" diameter connections for air is negligible.
Nutrients:
Since I am a newb I am going with the 1 part FloraNova grow for veg and FloraNova bloom for flowering. It seems like a lot of hydro growers are putting five or six different nuturient/additives in their solutions. That seemed to complex and anxiety producing for me. I just wanted something simple that would work. I'm sure I will change to different nurtients and complicate things for the next grow when I have learned more about what to use.
I think I'm also going to add some H202 into the res to kill bacteria (?).
Strains:
Super Silver Haze and Stonehedge (freebie!) bought from Seedboutique.
CO2:
While I was trying to sort out my ventillation issues I thought I could try using CO2 since my temps were so high (85+ F). It turns out I corrected this problem by buying the Vortex. But for a while I was considering buying a CAP CO2 regulator/solenoid valve since it was around the same price as the vortex. I already had a tank that I got from a friend so I decided to fill it anyway (only $17.00). Right now it's sitting outside the cab next to my passive vents so when I turn the valve, the gas goes right inside. I am just going to turn it on for 2-3 minutes after I'm done working on my plants. Obviously I will turn the exhaust fan off when this is being done. I know it's not very scientific or precise but I have a tank and I'm going to get my $ worth! I figured it can't really do any harm.
Pruning/Training method:
I don't have that much room for my plants to grow so I have to SCROG.
Well that's about it as far as the setup goes. I'd like to take a quick moment to thank MTF Sandman and MrGreenJeans and everyone else who helped me set everything up. Sorry for the wordy post everyone. Hopefully someone will find it useful. I welcome all criticiscms/advice/questions and even stupid comments.
Here's a picture of my 3 girls before they went into the cab.

Last edited:


 It will reward you with many phat dank kolas to smoke