What's new
  • Happy Birthday ICMag! Been 20 years since Gypsy Nirvana created the forum! We are celebrating with a 4/20 Giveaway and by launching a new Patreon tier called "420club". You can read more here.
  • Important notice: ICMag's T.O.U. has been updated. Please review it here. For your convenience, it is also available in the main forum menu, under 'Quick Links"!

Secret Rooms Bio Bucket Closet

Secret Room

Member
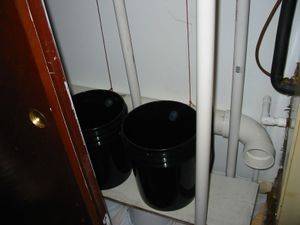
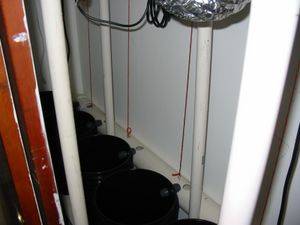
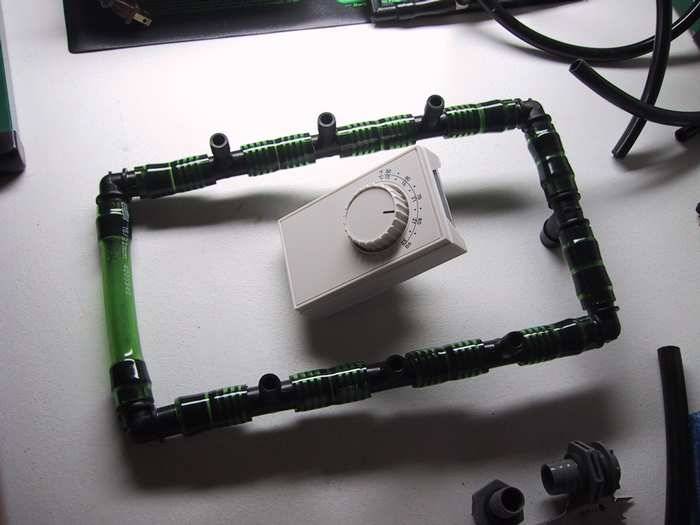
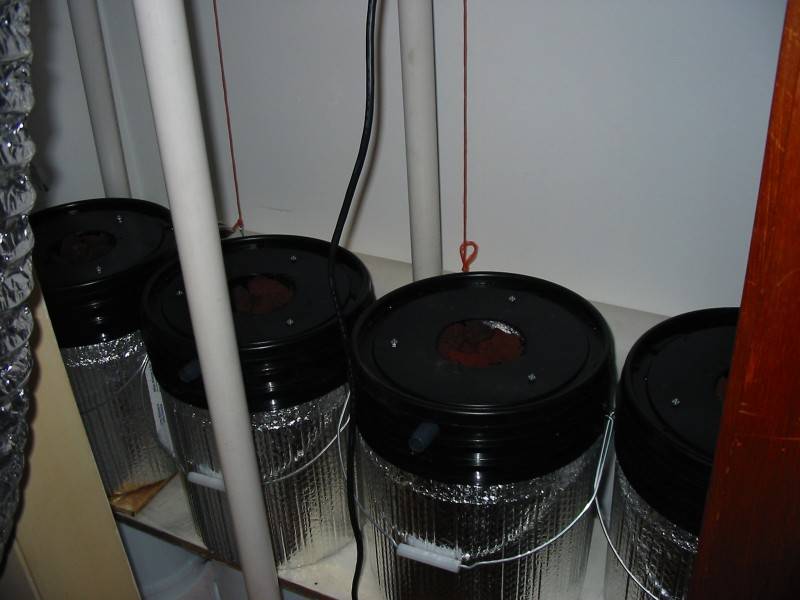
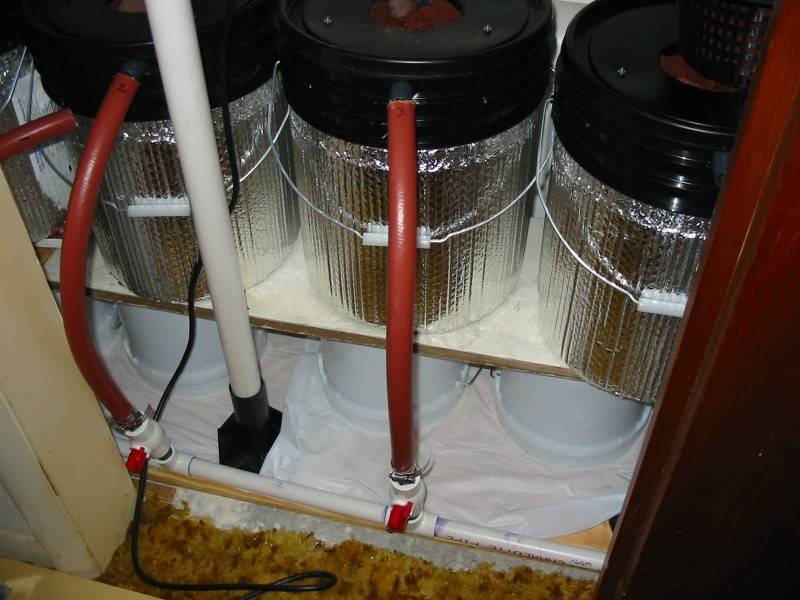
Well everyone likes pictures so this is how far I am on my bio bucket closet. It's been kind of slow since I am doing the work myself. I am doing the engineering of hanging fans and light movers, wiring a tube light now I have to fix the AC drain line that I must have hit and now it's leaking, so I quit working on the buckets. Boy I hope I don't have to tear everything apart just to repair it. I'm concerned that I don't get anymore leaks close to the AC unit. Don't want to have to call someone in to repair it. That would mean all the equipment would have to come out of the closet.


BigToke

Bio-Bucket Specialist *********
Veteran
Lot’s of luck to ya ~ I love watching these things go up from new construction thanks for sharing the pic’s…….
 
G

Guest

SR-

I hope you don't need a repairman - it's heartbreaking to get a bunch done and then have to take it apart before you can even get it finished.

Looking good so far! Here are some comments/suggestions based on what I see in these pics:

Looks like you've got lots of height for growth and to keep the lights far enough above the plants to avoid damage. Are the lights adjustable in height or are you planning on raising the plants up to meet the light and lowering them as they grow? Personally, I'd make the light adjustable; as much of a klutz as I am, I'd end up dropping at least one plant! The lights don't weigh as much to move, either.

Is that big loop of vent hose I see hanging down in the fourth picture because of the light mover? If not, shorten the venting and get rid of it - that loop alone is going to cut your air flow a whole bunch (probably at least 25%). If it is for the light mover, try to figure a way to support it so that the hose expands & contracts in a straight line instead of looping down like that. Maybe support it on a shelf or something.

Wherever possible, you are better off using smooth vent tubing instead of the coiled type stuff. Coiled air tubing puts a lot of drag on the air flow, which cuts down on your ventilation & puts extra load on the blower motor.

Are you planning on putting in an air scrubber of some type? From experimentation, I've found it is more effective to have the blower pulling air through the scrubber than it is to blow air through the scrubber. In other words, put the scrubber in line before the blower instead of after the blower.

I'm assuming the big PVC pipe running horizonally at the bottom in the first picture with the elbow on the end is for the air intake. You can drill holes along the length of the pipe to allow air flow to come in at the base of each plant - PVC is easy to drill into.

Once you have the entire closet put together, do a dry run with all the lights & ventilation in place before you put plants in there. Put thermometers in several locations/heights to check temps. If the closet is deep enough, stand inside the closet and close the door to see how the air flow feels - this will give you an idea of what your plants will be experiencing and let you judge whether you need to drill extra holes in the pipe for air to come in along the length.
 

Secret Room

Member
Well I felt around the pipe this morning and it was not dripping as bad as last night, so I am going to leave it alone. This winter when the AC will not be running I will put some silicone or something else to seal it then if that does not work I will see about repairing it.(don't want to open up a can of worms at this time I know by analizing this situation & the age of the system) I am shooting for tomorrow, at least the water circulation because I have clones rooting. The fans are still in the works this is a rough draft still have more things to engineer. May not be able to seal closet right away.The light is on a mover and has the adjustable hangers because of the close quarters I have 32" of travel before it reverses direction, this is because of the fan tubing. The PVC pipe you see is for the drainage of the buckets (bio bucket) I was working on that last night when I discovered the leak, and just quit at that point. I have to glue fittings to the buckets and connecting the drain hoses this afternoon after I get done doing a job today. The best is yet to come engineering the pump(Eheim 635gph) from the tank to the buckets. :wave:
 
G

Guest

SR-

Shows what I get by guessing, doesn't it? :confused:

Both of us are going to be hard at work on the new gardens this weekend, then. Oh boy, what fun! :D
 

Secret Room

Member
I glued the drain couplers. Now I am wondering after reading a little further that maybe my plans for using 3/4" PVC to supply my water to the buckets from my pump may not be the right thing to use maybe too much friction and not enough flow. My pump is Ehiem 1260 thats 635GPH (GPH at 4' is 475) intake is 1" and out is 3/4". My buckets are sitting 2ft high to the elbow. I was going to connect 3/4" pipe & 3/4" tees and 3/4"valves to run my line to buckets. Can anyone help me with this I want to get this running tomorrow Saturday. Will this be O.K. using 3/4" pipe & tee's
 

petemoss

Active member
Secret Room said:
I glued the drain couplers. Now I am wondering after reading a little further that maybe my plans for using 3/4" PVC to supply my water to the buckets from my pump may not be the right thing to use maybe too much friction and not enough flow. My pump is Ehiem 1260 thats 635GPH (GPH at 4' is 475) intake is 1" and out is 3/4". My buckets are sitting 2ft high to the elbow. I was going to connect 3/4" pipe & 3/4" tees and 3/4"valves to run my line to buckets. Can anyone help me with this I want to get this running tomorrow Saturday. Will this be O.K. using 3/4" pipe & tee's

You'd want the feeds to shoot out under some pressure, so I don't think you can run 3/4" pipe from the pump to the buckets. I used a 3/4" rectangular manifold with reducing tees (3/4 3/4 1/2") and ran 1/2" lines to the buckets.
 
Last edited:

Secret Room

Member
Mine is the same design as Big Toke's except mine has five buckets. I have everything the same, hoses, valves, elbows etc except for the big pump and larger supply pipe. I think you call it a supply pipe it's the one leading out from the pump to the T's that go to the buckets.
 

BigToke

Bio-Bucket Specialist *********
Veteran
Hiya S,R ~~ the idea pump size that I would use for your 5-bucket Bio-System would be a 258,GPH pump that would give an exchange rate of 8.5 times an hour to each bucket ~ remember the reason that I stress so hared for folks to get the right size pump for there grow is because for the next three mouths it will be running 24/7 ~ if your outlet {main supply line} is ¾ inch on your pump and if it were me I would go with ½ inch to each bucket the only deferent’s as to wither you use ¾ or ½ is the amount of adjustment at the valve, just make sure what ever you do that you put a control valve at the base of the main supply line and not in the line that’s going to the bucket!!

It’s like this; even if you use a ¾ tee your still going to be able to adjust it down to an ½ with the valve ~ I hope said that right if can help ya any further let me know.

Oh and as far as that pump goes, by my calculations you could run 12 Bio-Buckets with that thing at an exchange rate of 10-times an hour……WOW
 

Secret Room

Member
I had to go to get more parts for the valves to connect to the supply line.On the way back to the house I remembered that I did'nt have the correct size lava rock so I went to the landscape supply in the middle of the afternoon and picked through lava rock. It sure was hot in the middle of the yard took some of the energy out of me. I managed to get the baskets connected to the lids and loaded the rock into it and rinsed it off good. Then I insulated the buckets and then I baked up some Ziti for tomorrow.


Last edited:

BigToke

Bio-Bucket Specialist *********
Veteran
Everything look nice ~ HOLY COW!! Look at that Ziti!! I bet you didn’t know that BigToke works for food!!!........lol
 

Secret Room

Member
Big Toke... Wish I could take you up on that. Here's where I'm at right now looks like I'm going to have to replace my 3/4" elbows on the buckets for 1/2" elbows because I had a heck of a time getting the hose on the bottom valve ends. I put the hoses outside in the sun and made up soapy water, only got them on a couple of barbs enough to put clamp on.Too tight in the closet to muscle it on. I can't take the buckets outside and get everything back in the closet, because of my light & fan rack. I'm going to have to figure out how to put my clones in a temp situation till this gets running. I saw on someone elses thread about using perilite then I could rinse the root off & insert the rapid rooter into the system. Thought I would have it running tonight, maybe I can get the 1/2" elbows at Home Depot if not tomorrow I will travel to my other place I get my supplies.
 

BigToke

Bio-Bucket Specialist *********
Veteran
yea I see what you mine ~ here’s what I did, I used 3-in-one household oil just one drop on the tip of my finger and then rubbed it up into the hose and then pushed onto the barb, it’s not easy but a tight fit is what you want……
 

mean mr.mustard

I Pass Satellites
Veteran
The closet's really taking on some character :D I really want to understand that pvc I see in the pic, I assume it's a drain to your rez?? Your last pic was of the intake line?? :confused: I really want to build me one, but I can't see any pics of those parts.... could ya help me out a little?
 

BigToke

Bio-Bucket Specialist *********
Veteran
What kind of parts are you looking for?...............pretty much everything is in the "How-To" thread isn’t it?
 
G

Guest

SR-

To get tight hoses over fittings, I use hot water. Heat some water in a cup in the microwave, dip the end of the hose into the hot water to soften & expand it, slip it over the fitting, and then let it cool. As it cools, it forms itself to the "barbs" on the fitting and makes a perfectly tight seal. This works for airline tubing as well as water lines.
 

BigToke

Bio-Bucket Specialist *********
Veteran
Hiya Secret ~~ I’d say this would go real good with a bowl of that Ziti……


Latest posts

Latest posts

Top