Hello everyone,
This is my first grow journal here at ICmag. I'm keeping a journal on another site and I'm too lazy so I'm just copying and pasting it from that site. That's why all of my pics say property of another site.
Actually you all are going to get to watch me embark on my first attempt at Hydro. I've been growing in soil for some time and have decided to build my own system.
With a lot of help from a friend on another site, I've put together a 9 site Aero system that may interest some of you. I cannot take credit for this concept. I simply modeled my design after my friends. He's the Genius. I'm simply a Copycat.
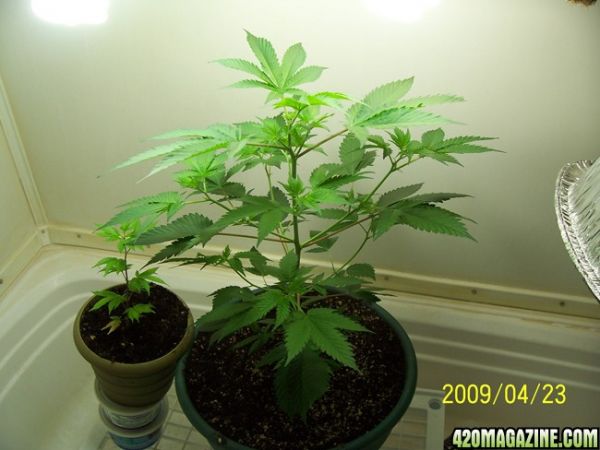
I'm going to take you through the construction of the unit itself, then show how I've placed it in my growspace. I'll also show how I configured things and talk about how and why I did them. On Monday I'll be loading it with 9 clones from a (Nirvana)Snow White Mother ...and away we go. I'll be placing a 4x5 net over them in order to get max yield. I'm hoping for 30 ounces dried.
Ok so let's talk about the unit itself:
I wanted a Hydro unit. I wanted at least 8 sites. I didnt want to have to mess with soil or hauling Distilled Water anymore...it was too much work. So I decided to spend some money and do it right.
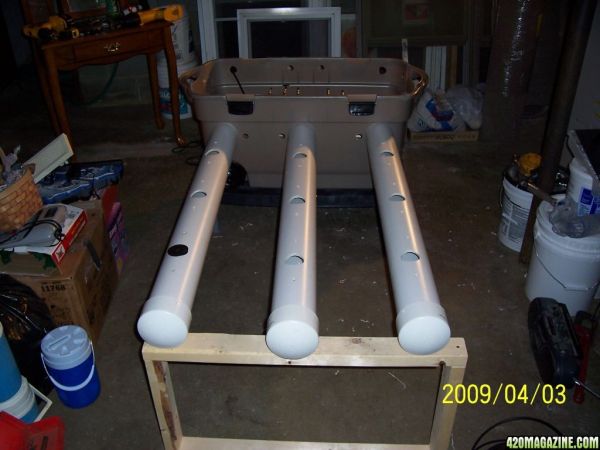
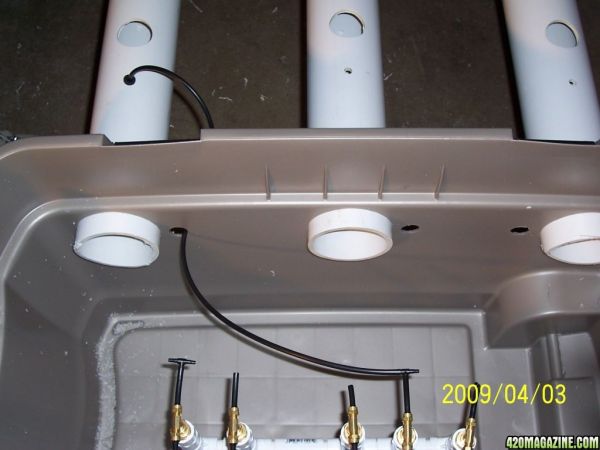
The design is fairly simple; Three seperate 4' sections of 4inch PVC each with 3 sites. These pipes are spaced 1 foot apart so that gives all 9 sites an even 1 foot in every direction to fill out if I'd ever choose to grow without the SCROG net. There is a 3/4" slope from the 2x frame which holds the ends of the pipes so that the water will automatically drain back into the 45 gallon res. The entire unit measures roughly 42"wide x 55" long.
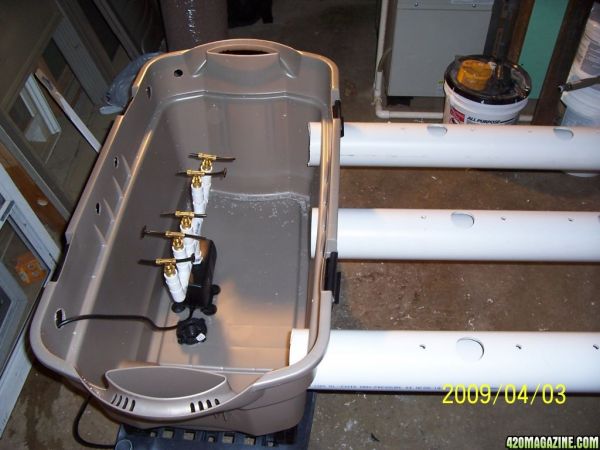
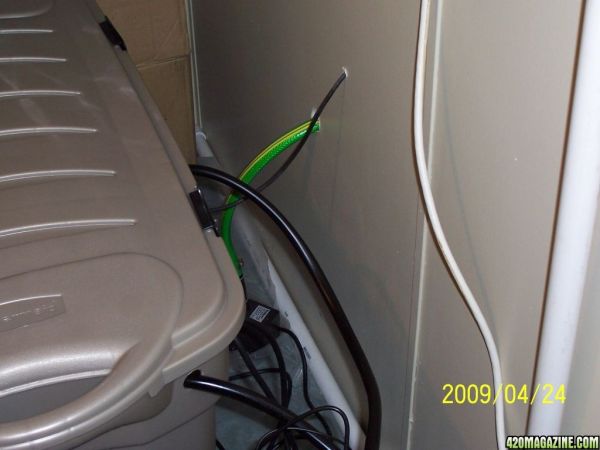
This shows the spray pump which is a 633 eco. I simply built the 1/2" PVC arms and fitted it down to accept 1/4" vinyl hoses. You'll also notice the drain in the bottom of the Res. Remember when I said I didnt want to have to carry distilled water anymore? I meant it. This res has a dedicated drain line(garden hose) and a pump which pumps it through the wall and into a bathtub for quick, easy, drainage.
Here you can see the basic setup of the pump and site hoses. I went to Wal Mart and got the little tees in the section where the Aquarium supplies are. They'll fit 1/4" Vinyl hose.
The Vinyl 1/4" hose carries the water to the sites and then hits the sprayers which are positioned within 1/2" of the plant site.
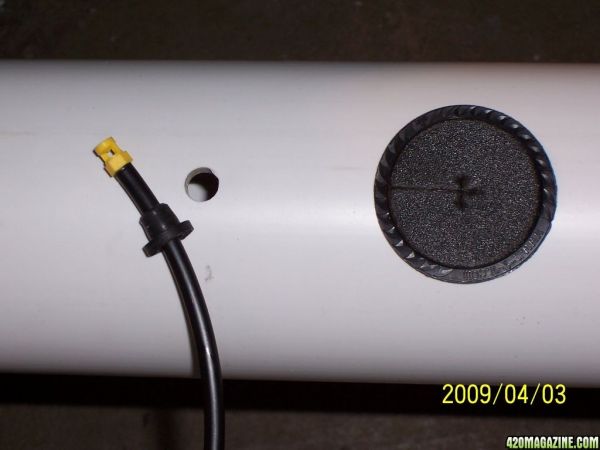
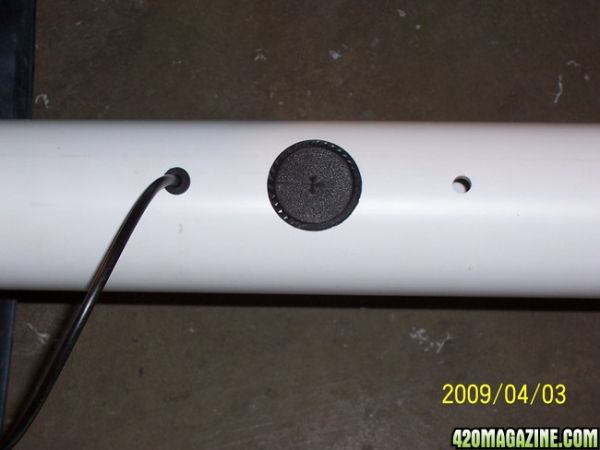
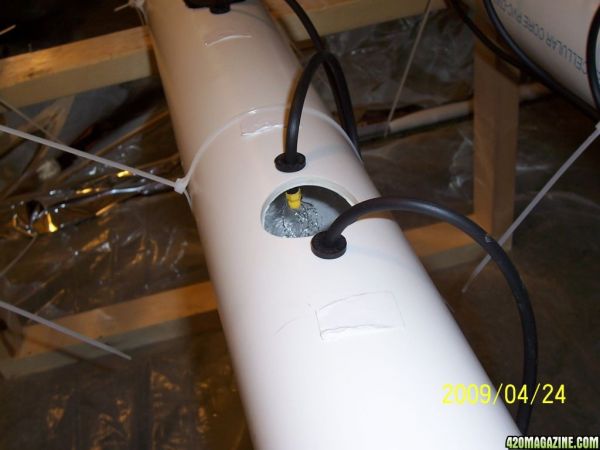
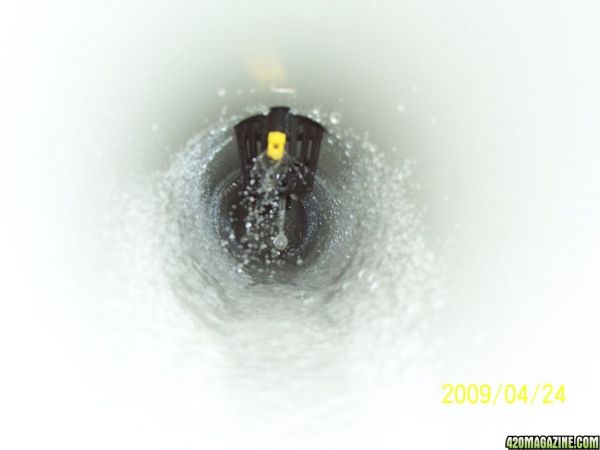
* NOTE * I bought a 633 thinking that it would be more than enough to spray water 2 inches with basically 0 head and was surprised to find that it didnt even come close. I had originally drilled the hose holes 2 1/2 inches to each side of the 2 inch pots. I had to reposition them to within 1/2 inch of the pots. Now the stream reaches the pots just fine. The rubber grommet is a 6mm grommet. The hole was drilled with a 7/16" bit and the grommet makes a nice snug fit. The sprayer is a 333* head. The Red or Green 360* sprayers work too. These are 2 inch pots with 2 inch Neoprene holders. We go from clone to Harvest in this system. No BS hassle.
I put a Bulkhead fitting on the bottom of the tub and threaded a 1/2" watter hose valve up into it. When it's time to flush my res I simply open the valve and turn on my drain pump (350gph) and it drains out the bottom. I siliconed it and used teflon tape and it doesnt leak a drop. Notice that the res sits on a heavy duty stand. I had to leave room for plumbing underneath and this also allows us to place a catch tray of some sort just incase it decides to leak. It's better to be cautious. Don't skimp on plumbing.
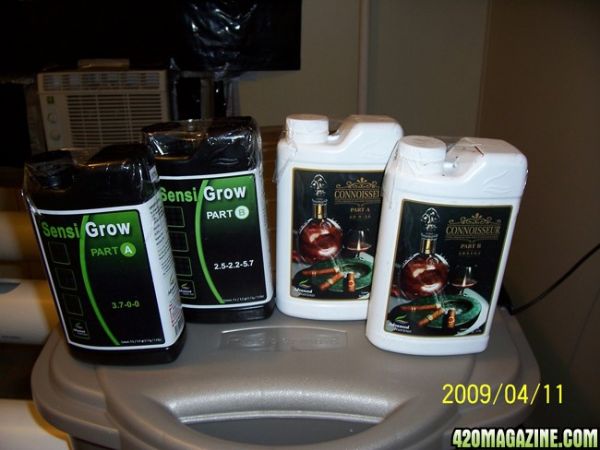
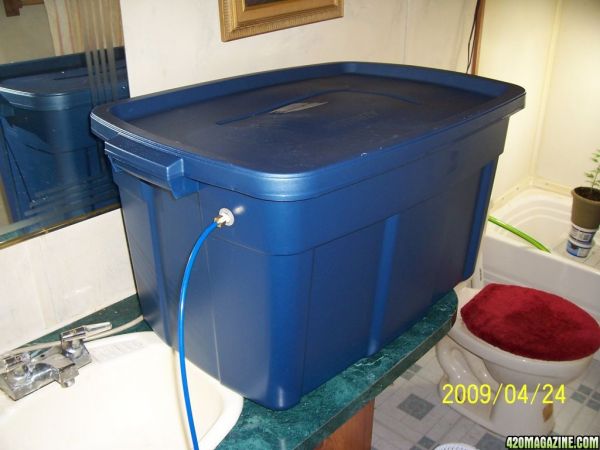
Speaking of don't skimp...... Give your plants good water. Invest in a Reverse Osmosis system. 132.00 on Ebay all day long. City tap water is garbage. PPM of mine ran 300 with PH of 7.8 .... yuck. After installing my RO unit my water is 0 PPM.
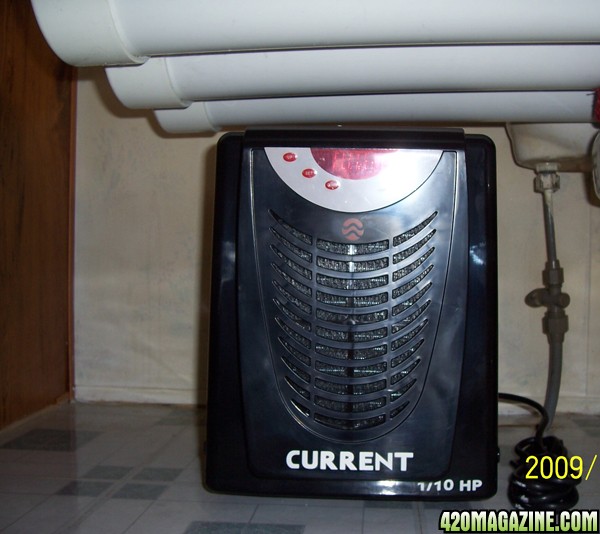
However, oxygen uptake for roots is best from 65 to 69* so we have to keep our res cool to avoid Algae/disease. That's where my 1/10 HP chiller comes in. This will keep my res at 65*, 24 hours a day. It's pricey at (355.00) but it's the best insurance against disease.
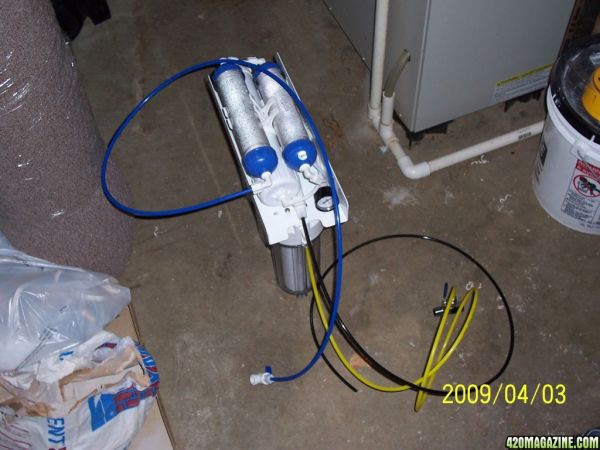
Here's my RO unti installed. I'm no plumber. Trust me, if I can do it, ANYONE can.
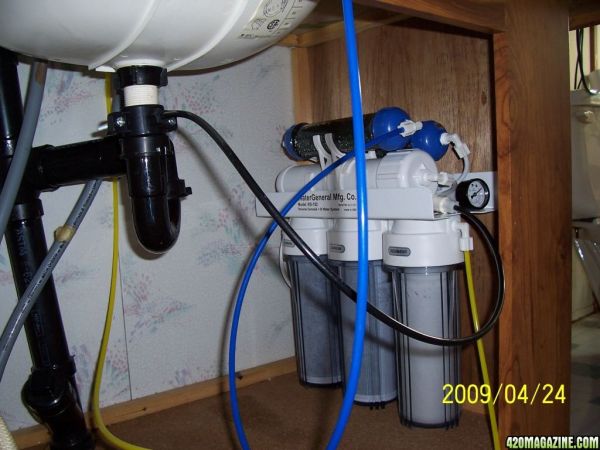
Now the RO unit feeds this 30 gallon Rubbermaid RO res which then feeds my Nute res through the wall via a 1/4" vinyl hose.
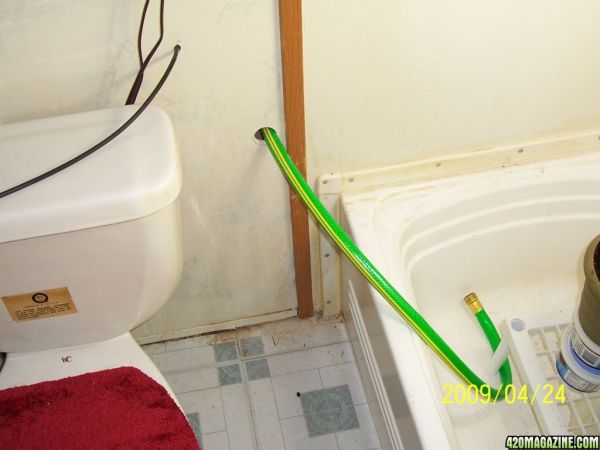
Notice that the drain hose(garden hose) comes back through the wall just under where the res feed goes through. My flower room is obv right on the other side of the wall.
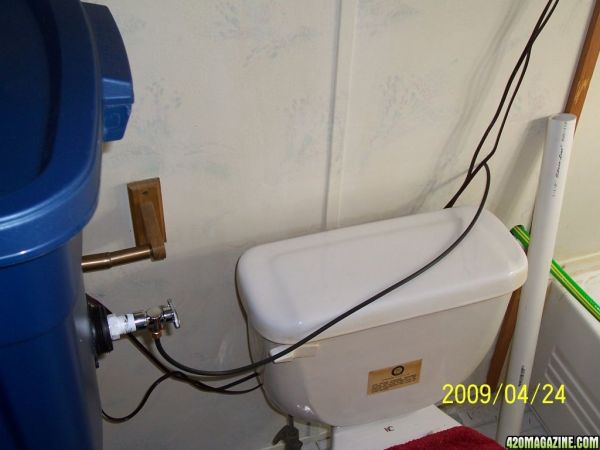
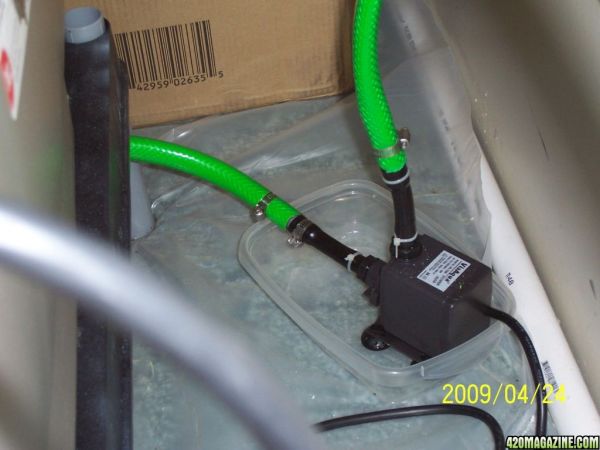
Here's a shot of the res with the top on. Notice the lines coming through the wall. The black 1/2" Vinyl hose is the in and out to the Chiller.
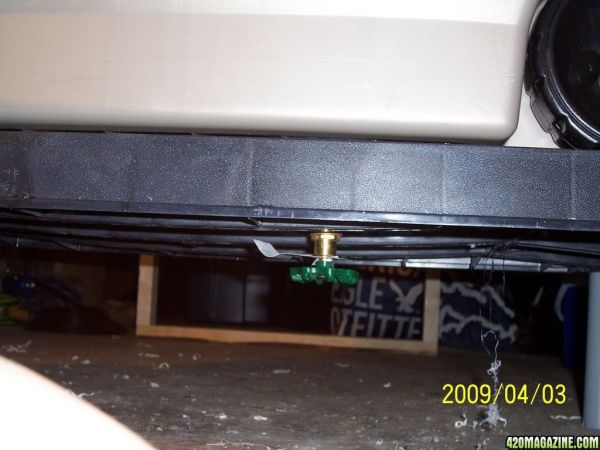
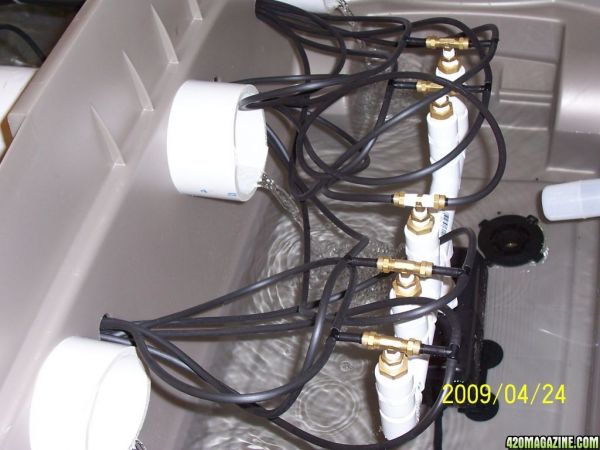
So here's a look at the spray pump after all the vinyl hoses have been hooked up. See those brass tees? You need them to build this system and they're 46.00 for 10...lol anyway, you can see the water draining back into the res as the sprayers are on in this picture. Notice the float valve in the rear....that's what feeds the nute res and keeps it from overflowing.
Here's a look at the Chiller pump. Mine is a Danner 500gph mag drive pump. It'll keep your res circulating at a cool 65*. It sits right beside my res.
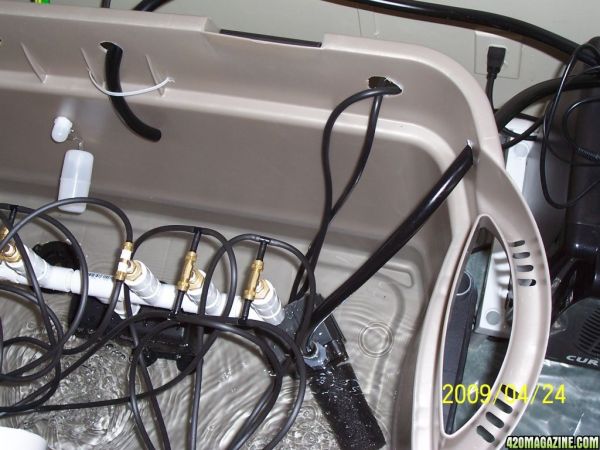
The spray jets in action. I simply attached them using zip ties. The white Duct tape covers the old holes.

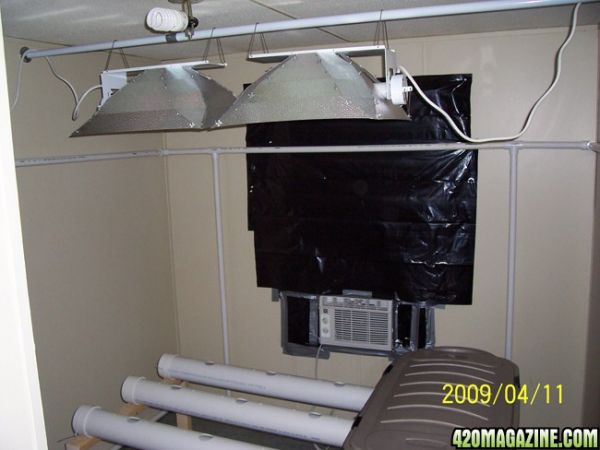
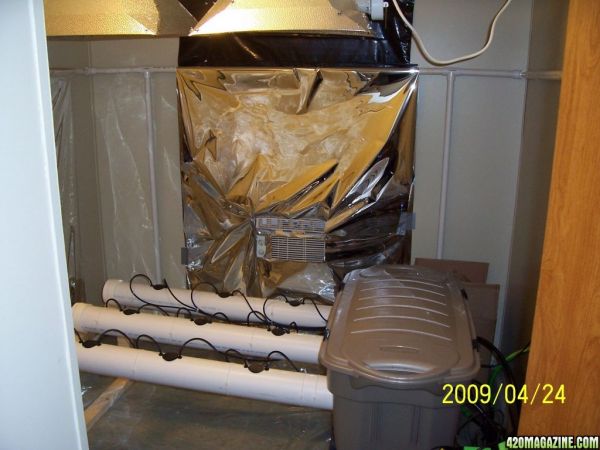
Now, here's the system as she sits. The flower room is 7x7. There are (2) 600 watt HPS units hanging overhead.
No dirt, no carrying water, no hassle. The beauty of this unit is that I can place the cuttings right into the 2" neoprene pots and start spraying them with 200 PPM water and in a few days they will root and away we go. I go from clone to harvest in this. There's no need for a veg room, only a place to keep a mother which I keep right in the bathtub where my res drains.....
I keep the mother under (4) 26 watt CFLS. I'll cut 9 clones and go. Right now she will only yield 5 or 6 good clones. I need to wait 3 or 4 days and then I'll be ready.
Anyway.... here's how I set up my flower space:
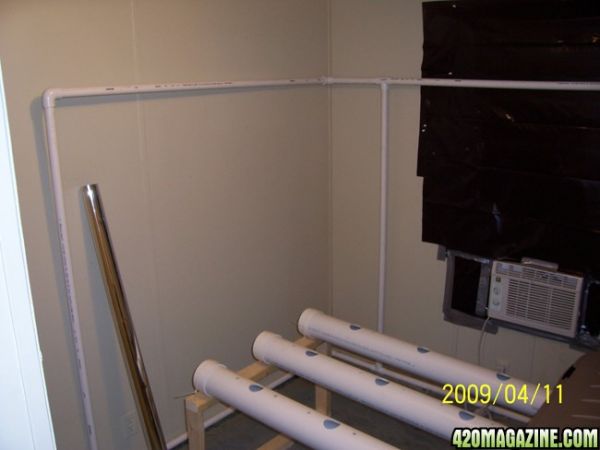
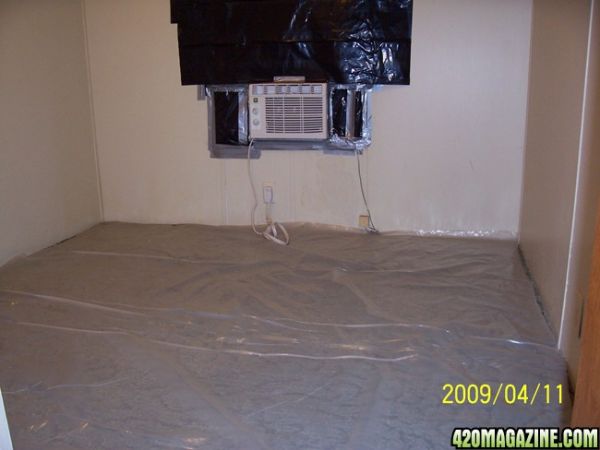
Empty room with a 5000 BTU window AC.
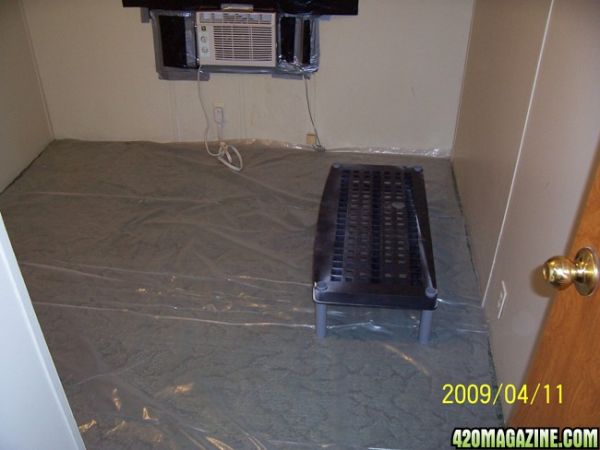
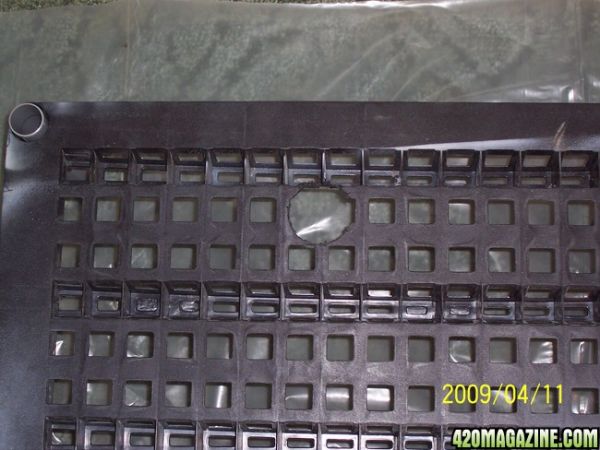
The res stand with hole cut to accomodate the drain.
This is my first grow journal here at ICmag. I'm keeping a journal on another site and I'm too lazy so I'm just copying and pasting it from that site. That's why all of my pics say property of another site.
Actually you all are going to get to watch me embark on my first attempt at Hydro. I've been growing in soil for some time and have decided to build my own system.
With a lot of help from a friend on another site, I've put together a 9 site Aero system that may interest some of you. I cannot take credit for this concept. I simply modeled my design after my friends. He's the Genius. I'm simply a Copycat.
I'm going to take you through the construction of the unit itself, then show how I've placed it in my growspace. I'll also show how I configured things and talk about how and why I did them. On Monday I'll be loading it with 9 clones from a (Nirvana)Snow White Mother ...and away we go. I'll be placing a 4x5 net over them in order to get max yield. I'm hoping for 30 ounces dried.
Ok so let's talk about the unit itself:
I wanted a Hydro unit. I wanted at least 8 sites. I didnt want to have to mess with soil or hauling Distilled Water anymore...it was too much work. So I decided to spend some money and do it right.
The design is fairly simple; Three seperate 4' sections of 4inch PVC each with 3 sites. These pipes are spaced 1 foot apart so that gives all 9 sites an even 1 foot in every direction to fill out if I'd ever choose to grow without the SCROG net. There is a 3/4" slope from the 2x frame which holds the ends of the pipes so that the water will automatically drain back into the 45 gallon res. The entire unit measures roughly 42"wide x 55" long.
This shows the spray pump which is a 633 eco. I simply built the 1/2" PVC arms and fitted it down to accept 1/4" vinyl hoses. You'll also notice the drain in the bottom of the Res. Remember when I said I didnt want to have to carry distilled water anymore? I meant it. This res has a dedicated drain line(garden hose) and a pump which pumps it through the wall and into a bathtub for quick, easy, drainage.
Here you can see the basic setup of the pump and site hoses. I went to Wal Mart and got the little tees in the section where the Aquarium supplies are. They'll fit 1/4" Vinyl hose.
The Vinyl 1/4" hose carries the water to the sites and then hits the sprayers which are positioned within 1/2" of the plant site.
* NOTE * I bought a 633 thinking that it would be more than enough to spray water 2 inches with basically 0 head and was surprised to find that it didnt even come close. I had originally drilled the hose holes 2 1/2 inches to each side of the 2 inch pots. I had to reposition them to within 1/2 inch of the pots. Now the stream reaches the pots just fine. The rubber grommet is a 6mm grommet. The hole was drilled with a 7/16" bit and the grommet makes a nice snug fit. The sprayer is a 333* head. The Red or Green 360* sprayers work too. These are 2 inch pots with 2 inch Neoprene holders. We go from clone to Harvest in this system. No BS hassle.
I put a Bulkhead fitting on the bottom of the tub and threaded a 1/2" watter hose valve up into it. When it's time to flush my res I simply open the valve and turn on my drain pump (350gph) and it drains out the bottom. I siliconed it and used teflon tape and it doesnt leak a drop. Notice that the res sits on a heavy duty stand. I had to leave room for plumbing underneath and this also allows us to place a catch tray of some sort just incase it decides to leak. It's better to be cautious. Don't skimp on plumbing.
Speaking of don't skimp...... Give your plants good water. Invest in a Reverse Osmosis system. 132.00 on Ebay all day long. City tap water is garbage. PPM of mine ran 300 with PH of 7.8 .... yuck. After installing my RO unit my water is 0 PPM.
However, oxygen uptake for roots is best from 65 to 69* so we have to keep our res cool to avoid Algae/disease. That's where my 1/10 HP chiller comes in. This will keep my res at 65*, 24 hours a day. It's pricey at (355.00) but it's the best insurance against disease.
Here's my RO unti installed. I'm no plumber. Trust me, if I can do it, ANYONE can.
Now the RO unit feeds this 30 gallon Rubbermaid RO res which then feeds my Nute res through the wall via a 1/4" vinyl hose.
Notice that the drain hose(garden hose) comes back through the wall just under where the res feed goes through. My flower room is obv right on the other side of the wall.
Here's a shot of the res with the top on. Notice the lines coming through the wall. The black 1/2" Vinyl hose is the in and out to the Chiller.
So here's a look at the spray pump after all the vinyl hoses have been hooked up. See those brass tees? You need them to build this system and they're 46.00 for 10...lol anyway, you can see the water draining back into the res as the sprayers are on in this picture. Notice the float valve in the rear....that's what feeds the nute res and keeps it from overflowing.
Here's a look at the Chiller pump. Mine is a Danner 500gph mag drive pump. It'll keep your res circulating at a cool 65*. It sits right beside my res.
The spray jets in action. I simply attached them using zip ties. The white Duct tape covers the old holes.
Now, here's the system as she sits. The flower room is 7x7. There are (2) 600 watt HPS units hanging overhead.
No dirt, no carrying water, no hassle. The beauty of this unit is that I can place the cuttings right into the 2" neoprene pots and start spraying them with 200 PPM water and in a few days they will root and away we go. I go from clone to harvest in this. There's no need for a veg room, only a place to keep a mother which I keep right in the bathtub where my res drains.....
I keep the mother under (4) 26 watt CFLS. I'll cut 9 clones and go. Right now she will only yield 5 or 6 good clones. I need to wait 3 or 4 days and then I'll be ready.
Anyway.... here's how I set up my flower space:
Empty room with a 5000 BTU window AC.
The res stand with hole cut to accomodate the drain.